Colombian Tamales How-2 Guide
Published by nika on Friday, December 29, 2006 at 11:49 AM.
Christmas in Colombia is QUITE a production. Its not just one or two days like here in the US and it can be exhausting if you are not used to partying constantly for a better part of some 15 days, day and night after day and night. If you think you will be spending christmas in Colombia next year be sure to condition your liver with a serious regimen of rum training over several months. Otherwise, you will be such a light-weight that you will not remember past December 15th or so.
One of my most enduring memories from Colombian Christmases would have to be eating tamales at midnight on Christmas Eve. Even though I now live way the h*ll north of the beautiful equatorial paradise that is Colombia and far from my mom, I set out to make my own tamales this year (first time for me). I have put together a few pictures of the assembly process to help you with the how-to. Since I was shooting in the kitchen with low crappy lighting and also taking care of three kids and dealing with a delivery man, all at once, my shots are not the best here and not in great focus. I apologize for that ahead of time!
This is best done surrounded by all of your favorite relatives (preferably mamas, abuelitas, and tias who know how to do this and who have all sorts of stories to tell) so that you have help and make it all go by quickly. I had just myself!

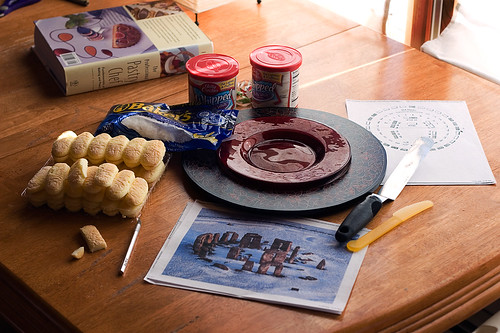
(Christmas Eve Tamales - The set-up for assembly)
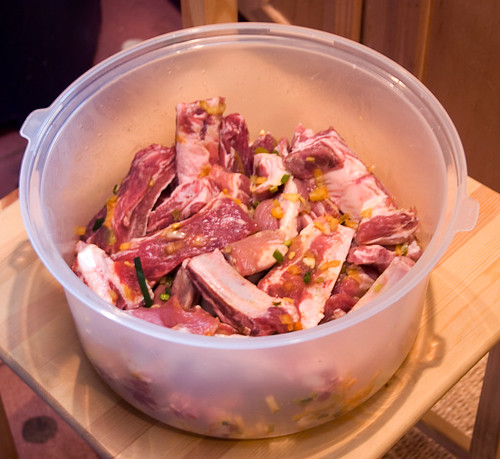
(Pork and chicken are marinated overnight)
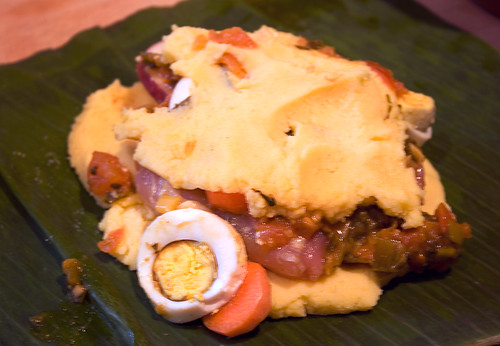
(Filling includes masa, eggs, peas, pork, chicken, carrots, and hogao")
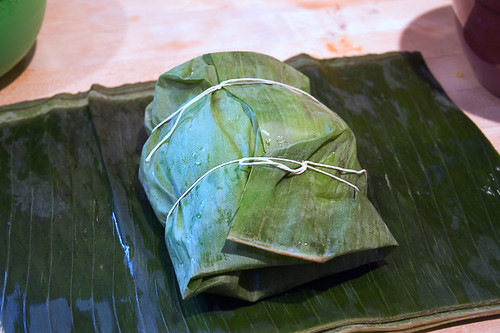
(Wrap tamal up in banana leaves and tie with string)

(Wrap tamal up in foil and steam 3 hours)
Here is the recipe that our family uses to make Colombian tamales. There is quite a bit of preparation time, so you will need to start at least two or three days ahead of the planned serving time. This recipe should make about 20 tamales.
Ingredients:
20 chicken thighs, skinned and defatted (save this. Can be rendered to crisps and schmaltz for other recipes).
20 pork ribs about the length of your finger with a good amount of meat on them. You'll probably have to buy them as a rack and chop them up yourself. (If you don't want pork ribs, use 20 chicken legs)
Marinade:
3 bunches of green onions, finely chopped
6 cloves of garlic, minced
2 heaping tsps of ground cominos
1 tsp of salt
1 packet of "sazon" seasoning
Hogao:
5 large ripe tomatoes, chopped
2 bunches of green onions, finely chopped
6 garlic cloves, finely chopped
1 tablespoon of ground cominos
1/2 package of "sazon" azafran
1/2 cup of packed, chopped cilantro
1/4 cup of olive oil
salt to taste
4 C "La Venezolana" or "ArepaHarina" precocida masa harina (extremely fine precooked corn meal - you simply can not use any substitutes here, find this ingredient)
Tamales:
5 large carrots, peeled and 1/4" sliced
2 cups of frozen green peas
5 large red potatoes, scrubbed, 1/4" sliced (put in water to prevent discoloration)
8 hard-boiled eggs, peeled and 1/4" sliced
Package of thawed/frozen banana "platano" leaves (latino food store), cut into 12 inch square pieces and rinsed in VERY hot tap water.
Clean string or cord used for tying meat roasts.
Aluminum foil
A very large crab or lobster steamer with a bottom rack and lid. Fill with salted water about 3 " above the bottom rack.
Pique Sauce:
6 cleaned green onions
3 cloves garlic
1/4 cup of fresh lemon juice
1/4 cup of minced cilantro
1 tsp of ground comino
1/8 cup of sugar
1/2 cup of white vinegar
salt to taste
Directions:
Two or three days before:
Put the chicken and ribs in separate containers. (Or if you are substituting more chicken, you can put all the meat in one container). Prepare the marinade from the ingredients listed above, divide and put 1/2 on the chicken and the other 1/2 on the ribs. With your hands, work the marinade into the meats. Cover and refrigerate until the next day.
Saute the listed "hogao" ingredients in the olive oil until wilted, set aside.
Preparation of the "Masa":
Corn dough or "masa". Put 4 cups of "La Venezolana" or "ArepaHarina" in a large bowl or container. Slowly add 5 cups of lukewarm (not hot) water or chicken broth. You'll probably have to use your hands to mix well. Most likely, you will need to add more water to get the "masa" to the consistency of cooked oatmeal or grits. This dough does not have the stiff consistency of "empanada" dough.
Assembly and cooking of the Tamales:
Place about a cup of the dough in the center of the banana leaf. Place one rib and one chicken thigh on top. Place about 3 slices each of the carrots, potatoes and egg on the meat. Spoon about 3 tablespoons of "hogao" on top of the vegetables and egg. Then spoon about a 1/2 cup of "masa" on top of all of this and gently spread as much out as you can. Now, fold the edges of the banana leaf over the filling so as to make a package. Do not let any of the filling show. If the leaf splits, just take another smaller piece of leaf and fold it around the package.
Tie up the package/tamale with the string or cord. Believe me, this tying up of the tamales in banana leaves takes practice!! After you have tied up the tamale/package, tear off a 12" sheet of aluminum foil and wrap it tightly around the tamale. Continue with the other tamales according to the above directions. Stack the tamales all the way to the top in the steamer pot and turn up the heat to high. If your pot does not hold all of them, just refrigerate the rest until you can steam them later, or, borrow another steamer pot. When you hear the water boiling furiously, turn the heat down to medium. Always make sure that the pot is steaming and that there is enough water in it. Cover tightly and steam for at least 3 hours. After that time, remove the top tamale and open it up to make sure that the meat is thoroughly cooked. It should be falling off the bone.
Serve the tamales on a section of banana leaf. (Warn guests not to eat the leaf! A favorite Colombian story is that a Gringo was served a tamale. When he finished it he said,"Boy, was this delicious!! However, the lettuce was kind of tough!!" (har,har).
Some Colombians like to put "pique" on their tamales.
To make pique sauce:
This sauce/relish is similar to "pico de gallo" except it does not include the minced jalapeno. If you want to use jalapeno, you can, but it's not legitimate Colombian. This relish is spooned into a bitten-off empanada or onto arepas, into tamales, etc. Yummmm! Its like a taste of sunshine!
Finely mince the green onions and the garlic. Add the other ingredients and let marinate for at least 2 hours. There should be enough liquid to almost reach the top of the relish. You may have to adjust by adding a little more vinegar.
I made enough to freeze (raw) and will see how they cook up out of the freezer at a later date!
Related Posts:
Technorati taggage:
food, Colombia, Colombian, tamal, christmas, navidad, latin, latino, hispanic, tamales.
One of my most enduring memories from Colombian Christmases would have to be eating tamales at midnight on Christmas Eve. Even though I now live way the h*ll north of the beautiful equatorial paradise that is Colombia and far from my mom, I set out to make my own tamales this year (first time for me). I have put together a few pictures of the assembly process to help you with the how-to. Since I was shooting in the kitchen with low crappy lighting and also taking care of three kids and dealing with a delivery man, all at once, my shots are not the best here and not in great focus. I apologize for that ahead of time!
This is best done surrounded by all of your favorite relatives (preferably mamas, abuelitas, and tias who know how to do this and who have all sorts of stories to tell) so that you have help and make it all go by quickly. I had just myself!
Here is the recipe that our family uses to make Colombian tamales. There is quite a bit of preparation time, so you will need to start at least two or three days ahead of the planned serving time. This recipe should make about 20 tamales.
Ingredients:
20 chicken thighs, skinned and defatted (save this. Can be rendered to crisps and schmaltz for other recipes).
20 pork ribs about the length of your finger with a good amount of meat on them. You'll probably have to buy them as a rack and chop them up yourself. (If you don't want pork ribs, use 20 chicken legs)
Marinade:
3 bunches of green onions, finely chopped
6 cloves of garlic, minced
2 heaping tsps of ground cominos
1 tsp of salt
1 packet of "sazon" seasoning
Hogao:
5 large ripe tomatoes, chopped
2 bunches of green onions, finely chopped
6 garlic cloves, finely chopped
1 tablespoon of ground cominos
1/2 package of "sazon" azafran
1/2 cup of packed, chopped cilantro
1/4 cup of olive oil
salt to taste
4 C "La Venezolana" or "ArepaHarina" precocida masa harina (extremely fine precooked corn meal - you simply can not use any substitutes here, find this ingredient)
Tamales:
5 large carrots, peeled and 1/4" sliced
2 cups of frozen green peas
5 large red potatoes, scrubbed, 1/4" sliced (put in water to prevent discoloration)
8 hard-boiled eggs, peeled and 1/4" sliced
Package of thawed/frozen banana "platano" leaves (latino food store), cut into 12 inch square pieces and rinsed in VERY hot tap water.
Clean string or cord used for tying meat roasts.
Aluminum foil
A very large crab or lobster steamer with a bottom rack and lid. Fill with salted water about 3 " above the bottom rack.
Pique Sauce:
6 cleaned green onions
3 cloves garlic
1/4 cup of fresh lemon juice
1/4 cup of minced cilantro
1 tsp of ground comino
1/8 cup of sugar
1/2 cup of white vinegar
salt to taste
Directions:
Two or three days before:
Put the chicken and ribs in separate containers. (Or if you are substituting more chicken, you can put all the meat in one container). Prepare the marinade from the ingredients listed above, divide and put 1/2 on the chicken and the other 1/2 on the ribs. With your hands, work the marinade into the meats. Cover and refrigerate until the next day.
Saute the listed "hogao" ingredients in the olive oil until wilted, set aside.
Preparation of the "Masa":
Corn dough or "masa". Put 4 cups of "La Venezolana" or "ArepaHarina" in a large bowl or container. Slowly add 5 cups of lukewarm (not hot) water or chicken broth. You'll probably have to use your hands to mix well. Most likely, you will need to add more water to get the "masa" to the consistency of cooked oatmeal or grits. This dough does not have the stiff consistency of "empanada" dough.
Assembly and cooking of the Tamales:
Place about a cup of the dough in the center of the banana leaf. Place one rib and one chicken thigh on top. Place about 3 slices each of the carrots, potatoes and egg on the meat. Spoon about 3 tablespoons of "hogao" on top of the vegetables and egg. Then spoon about a 1/2 cup of "masa" on top of all of this and gently spread as much out as you can. Now, fold the edges of the banana leaf over the filling so as to make a package. Do not let any of the filling show. If the leaf splits, just take another smaller piece of leaf and fold it around the package.
Tie up the package/tamale with the string or cord. Believe me, this tying up of the tamales in banana leaves takes practice!! After you have tied up the tamale/package, tear off a 12" sheet of aluminum foil and wrap it tightly around the tamale. Continue with the other tamales according to the above directions. Stack the tamales all the way to the top in the steamer pot and turn up the heat to high. If your pot does not hold all of them, just refrigerate the rest until you can steam them later, or, borrow another steamer pot. When you hear the water boiling furiously, turn the heat down to medium. Always make sure that the pot is steaming and that there is enough water in it. Cover tightly and steam for at least 3 hours. After that time, remove the top tamale and open it up to make sure that the meat is thoroughly cooked. It should be falling off the bone.
Serve the tamales on a section of banana leaf. (Warn guests not to eat the leaf! A favorite Colombian story is that a Gringo was served a tamale. When he finished it he said,"Boy, was this delicious!! However, the lettuce was kind of tough!!" (har,har).
Some Colombians like to put "pique" on their tamales.
To make pique sauce:
This sauce/relish is similar to "pico de gallo" except it does not include the minced jalapeno. If you want to use jalapeno, you can, but it's not legitimate Colombian. This relish is spooned into a bitten-off empanada or onto arepas, into tamales, etc. Yummmm! Its like a taste of sunshine!
Finely mince the green onions and the garlic. Add the other ingredients and let marinate for at least 2 hours. There should be enough liquid to almost reach the top of the relish. You may have to adjust by adding a little more vinegar.
I made enough to freeze (raw) and will see how they cook up out of the freezer at a later date!
Related Posts:
- How-2 guide on how to make Platanos (fried plantains or tostones)
- Yucas Fritas (Fried Yucas or Cassava Root) Recipe and How 2 photos
- Empanadas - The Recipe
- Flash Flickr Movie of How to make Colombian Empanadas
- Chicharron - Deep fried pork belly - How To
- How to make Colombian Empanadas - directions
- Latest full recipe for Colombian Bunuelos (2006 post)
- Last year's Christmas Bunuelo Decadence
- A Colombian breakfast How-2 guide
- Colombian Frescos
- Lechona preparation
Technorati taggage:
food, Colombia, Colombian, tamal, christmas, navidad, latin, latino, hispanic, tamales.
Happy Winter Solstice! May you have light
Published by nika on Thursday, December 21, 2006 at 8:36 AM.
Today is the shortest day of the year and tonight is the longest night. It is an important time for those of us who live in northern lattitudes because it marks a very real and very important occasion, the switch from loss of light every day to the slow return of light, precious seconds every day. I dont get SAD (seasonal affective disorder) so much as just sensitivity to light length and quality. On this day we celebrate the Sun and light candles at night in anticipation for the new year and rememberance for the past year.
If you would like to learn more about the winter solstice and traditions around it (ancient and new) try these links:
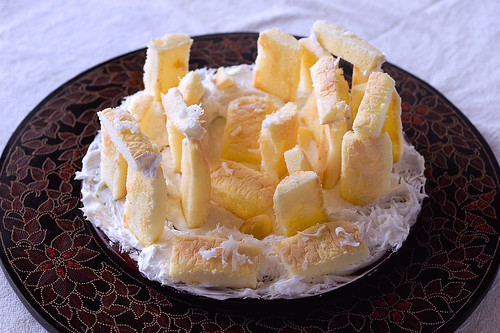
Winter Solstice wiki entryTo mark the occasion, we made our own stonehenge cake! We printed out some layouts and photos.
Stonehenge wiki entry
Maps and layouts
Amazing Stonehenge photo gallery
Stonehenge clones and morphisims
Party at the henge
Modern Stonehenge Solstice Ritual
Modern Druids and the Stonehenge
Information on Druids and the Stonehenge
List of Solstice websites that may interest you

Then we set to work!
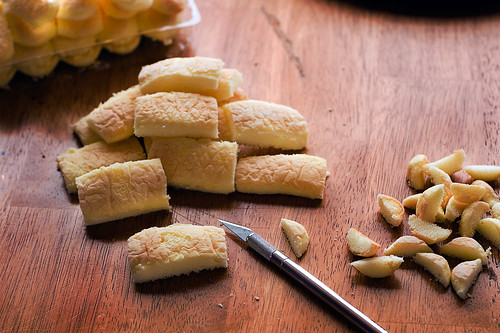
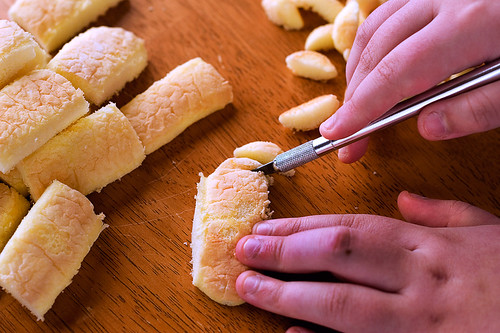
We gathered the various materials we would need to build our stonehenge and sat down to the hard work of nibbling on ladyfingers and sneaking bites of frosting.
We trimmed off the ends of the ladyfingers and cut a few in half lengthwize (for the capstones).
Q spread frosting on her plate as a foundation.
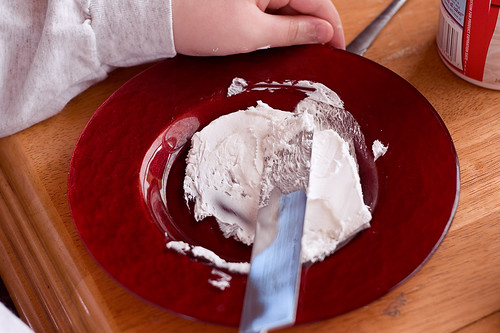
KD did the same. Baby O worked on his nap.
The frosting had to be put all over the plate. Here Q is using an off-set spatula.
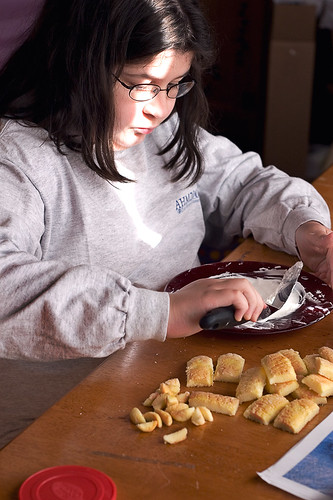
She had to be sure to get a deep enough layer of "snow" so that the ladyfinger stones would stand upright.
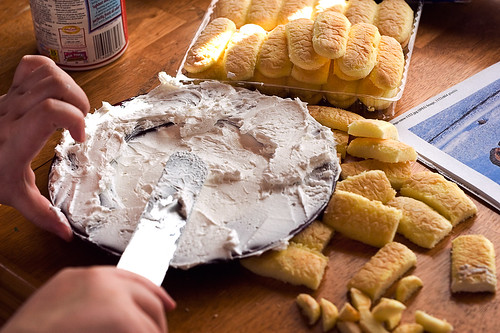
Q studied the photos and layouts of the Stonehenge and then set to work constructing hers. If you look carefully, you will see that she stuck very closely to the actual layout.

Almost done.
The henge takes shape!

KD's henge is coming together beautifully. It did not last long tho. Alas, cake and frosting are too tempting for a 3 year old.
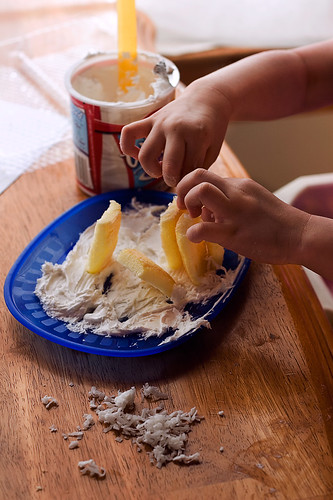
And voila, CakeHenge 2006!
Christmas Colombian Bunuelos How-2 Guide
Published by nika on Tuesday, December 19, 2006 at 12:58 PM.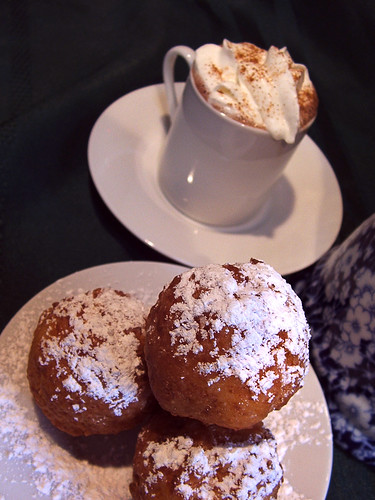
© 2005-2006 Nika All rights reserved)
Last year I did a quickie post on Colombian bunuelos but I did not do the How-2 Guide or give a recipe. I will do that now.
Colombian Bunuelos
Ingredients:
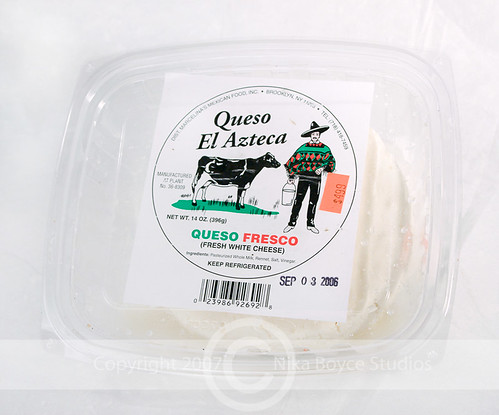
2 C white fresh farmers cheese, finely ground or crumbled with fork
2 C Colombian "Bunuelina" mix
2 eggs
milk to moisten
canola oil for deep frying
Directions:
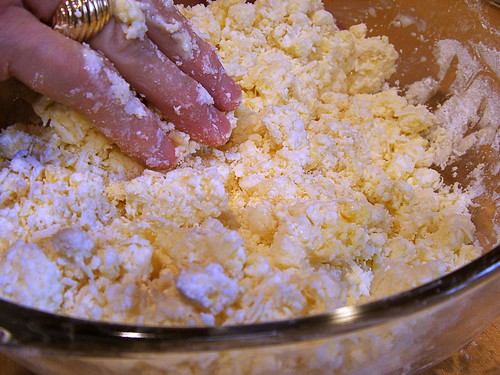
Mix all ingredients (except oil) in a bowl.
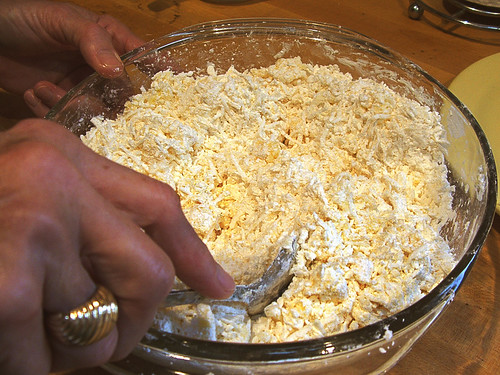
Knead, adding a little bit of milk to often the dough and make it hold together.
© 2005-2006 Nika All rights reserved)
Make balls a little smaller than the size of a golf ball, DO NOT COMPRESS the dough.
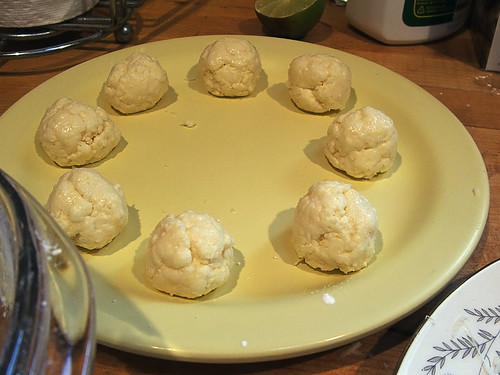
© 2005-2006 Nika All rights reserved)
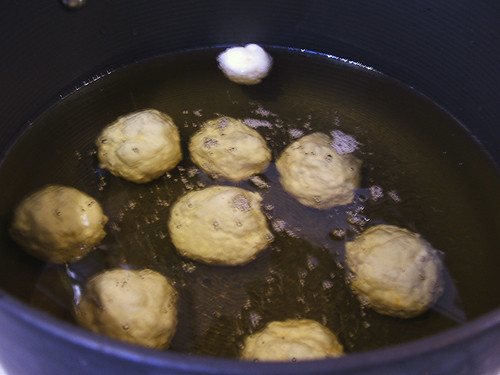
DO NOT DROP THESE DOUGH BALLS INTO HOT OIL.
Heat the oil to very warm (you can stick your finger in it but not very long). Gently drop the balls into the oil and then turn up the heat. The balls will linger at the bottom of the pot until the oil heats up. They will turn themselves as they come up "for air." Fry until light brown. Remove to a drained surface to cool.
© 2005-2006 Nika All rights reserved)
For the next batch let the oil cool down (doesnt have to be as cool as when you first started) such that a test dough ball will drop to the bottom and then rise slowly to the top. Once the oil has cooled enough to do this, add your next batch.
Always use a splatter shield.
If you drop them into hot oil they will explode and could seriously hurt you.
Related Posts:
- How-2 guide on how to make Platanos (fried plantains or tostones)
- Yucas Fritas (Fried Yucas or Cassava Root) Recipe and How 2 photos
- Empanadas - The Recipe
- Flash Flickr Movie of How to make Colombian Empanadas
- Chicharron - Deep fried pork belly - How To
- How to make Colombian Empanadas - directions
- Latest full recipe for Colombian Bunuelos (2006 post)
- Last year's Christmas Bunuelo Decadence
- A Colombian breakfast How-2 guide
- Colombian Frescos
- Lechona preparation
Technorati taggage:
food, Colombia, Colombian, bunuelo, christmas, navidad, latin, latino, hispanic, dessert, sweet, sugar, cheese, fried.
Judging and Peppermint Fluff Martinis (Well Fed Article)
Published by nika on Monday, December 18, 2006 at 9:39 AM.
(If you are looking for information on my contribution to the Menu for Hope III event go to this permalink)
I have been writing up a storm over at the Well Fed Network these days but not posting (as I should) here because things have been hectic! I have included my latest Spirit World article below for your sugar high consumption needs.
(link to that announcement)
I have a bit of other news - I was asked to be one of several judges for the annual Food Blog Awards, held over at the Well Fed Network. I am honored and very cognizant of the challenges that I will be facing. I take the awards very seriously (in terms of it being important to everyone concerned and the food blogging community) and will do my very best. I would also like all to know that, when asked to be a judge, I chose to withdraw myself from any consideration so that I can judge all categories (makes sense to me!). Being a good judge and member of the community is more important to me than winning one of the awards (not that I would, for sure! There is time in the future for all that)
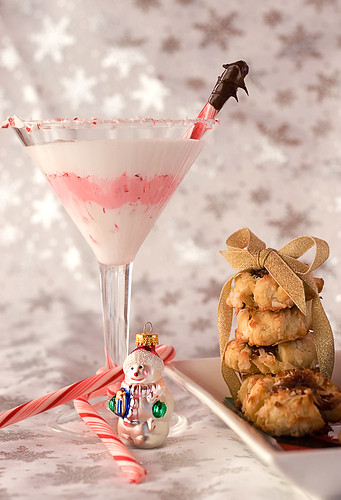
Peppermint Fluff Martinis (Well Fed Network Article 12/16/06)
This month’s drink for the Designated Driver is actually much more for the sugar-addicted than any other drink I have written about here before. I would be afraid to guess how many calories it might contain. It is honestly only for hard-core fluff lovers and adventerous adults and children.
I decided on this concept when I was making some rice crispies christmas cookies earlier this month.
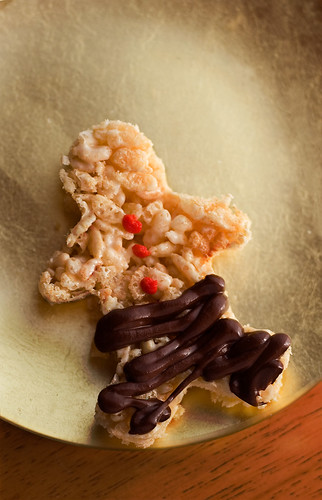
The fluff you use to make those cookies is really an amazing compound material. While it was cooking in the pan, it sort of deflated and became less than it was so I wanted to see what I could do with it that kept its glorious color and texture.
I surfed over to the official Fluff site and found their online cookbook (PDF) with all sorts of high-caloric nefarious recipes! This is actually the 9th edition of the Yumybook, the first was published in 1930! On page 13 are their “shakes”, drinks made from fluff, milk, and various amendments. I extended the concept and created the Peppermint Fluff Martini in this post. I am sure you can come up with your own favorite variation!
This recipe could benefit from the addition of peppermint schnapps if you were so inclined. I am working on one made with kaluha myself.
Peppermint Fluff Martini
The Yummybook directions call for the use of a blender, I used a stick immersion blender instead. It works just fine.
Ingredients:
Into a tall narrow mixing container add the fluff, milk, and 1 drop peppermint oil.
Mix until all fluff lumps are gone.
Split mix in half and add red coloring to one half, mix until incorporated.
Layer the white and pink fluff with additional peppermint chunks throughout.
To decorate top edge of glass (as shown), before assembling the drink dab a small amount of fluff on the edge and then dredge in finely crushed peppermint candy.
Finish with chocolate dipped peppermint stick.
Give to your loved ones. They will be lucky to finish one of these.

Resources:
I have been writing up a storm over at the Well Fed Network these days but not posting (as I should) here because things have been hectic! I have included my latest Spirit World article below for your sugar high consumption needs.
I have a bit of other news - I was asked to be one of several judges for the annual Food Blog Awards, held over at the Well Fed Network. I am honored and very cognizant of the challenges that I will be facing. I take the awards very seriously (in terms of it being important to everyone concerned and the food blogging community) and will do my very best. I would also like all to know that, when asked to be a judge, I chose to withdraw myself from any consideration so that I can judge all categories (makes sense to me!). Being a good judge and member of the community is more important to me than winning one of the awards (not that I would, for sure! There is time in the future for all that)
Peppermint Fluff Martinis (Well Fed Network Article 12/16/06)
This month’s drink for the Designated Driver is actually much more for the sugar-addicted than any other drink I have written about here before. I would be afraid to guess how many calories it might contain. It is honestly only for hard-core fluff lovers and adventerous adults and children.
I decided on this concept when I was making some rice crispies christmas cookies earlier this month.
The fluff you use to make those cookies is really an amazing compound material. While it was cooking in the pan, it sort of deflated and became less than it was so I wanted to see what I could do with it that kept its glorious color and texture.
I surfed over to the official Fluff site and found their online cookbook (PDF) with all sorts of high-caloric nefarious recipes! This is actually the 9th edition of the Yumybook, the first was published in 1930! On page 13 are their “shakes”, drinks made from fluff, milk, and various amendments. I extended the concept and created the Peppermint Fluff Martini in this post. I am sure you can come up with your own favorite variation!
This recipe could benefit from the addition of peppermint schnapps if you were so inclined. I am working on one made with kaluha myself.
Peppermint Fluff Martini
The Yummybook directions call for the use of a blender, I used a stick immersion blender instead. It works just fine.
Ingredients:
* 2 tablespoons fluffDirections:
* 2/3 C cold milk (I used 1% because thats what I had, didn’t effect it negatively. Might not want to go with the cream, not sure if that would be too fatty and cause pools of fat on the top of the drink)
* Crushed pepermint sticks
* 1 peppermint stick, dipped in melted chocolate
* red food coloring
* Lorann natural peppermint oil
Into a tall narrow mixing container add the fluff, milk, and 1 drop peppermint oil.
Mix until all fluff lumps are gone.
Split mix in half and add red coloring to one half, mix until incorporated.
Layer the white and pink fluff with additional peppermint chunks throughout.
To decorate top edge of glass (as shown), before assembling the drink dab a small amount of fluff on the edge and then dredge in finely crushed peppermint candy.
Finish with chocolate dipped peppermint stick.
Give to your loved ones. They will be lucky to finish one of these.
Resources:
Rumple Minze Peppermint Schnapps
Fluff
Lorann Oils
My Menu for Hope III contribution
Published by nika on Wednesday, December 13, 2006 at 2:47 PM.
For the winners of my prints and pinwheels who are visiting here - you do not need to register with blogger etc - just drop me an email at nika7k at yahoo dot com. After I verify your winning status, I will prepare and send your winning prize! Thanks again for bidding in the Menu For Hope!
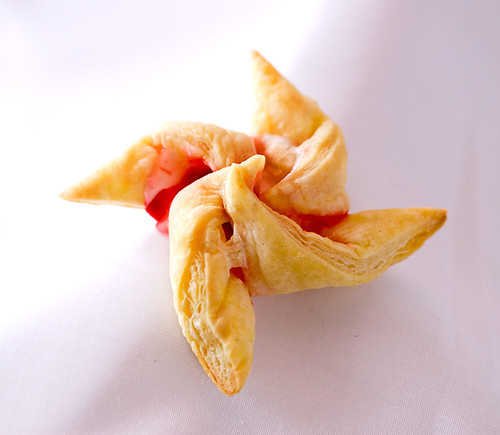
Peppermint Marshmallow pinwheel pastries
A contribution for the Menu for Hope III charity event.
Yumm.. you can almost taste the light crunchy pepperminty marshmallowy goodness that is this cookie! A piece of a peppermint candy cane, coddled amongst marshmallow clouds, is nestled by golden puff pastry.
You could be bidding on this as we speak! What you get is the following:
A signed and matted 8 X 10 print of the photo seen above.
12 freshly made (JUST FOR YOU) Peppermint Marshmallow Pinwheel Pastries
Shipped to your door! (This is only for donors in the continental USA)
I am offering 5 chances to win this gift (Thats A LOT of printing (professional), matting, baking and shipping, which I pay for, as my contribution)
The codes for each set of 1 print and 12 cookies are:
UE27
UE28
UE29
UE30
UE31
UE32
You can bid on this by going to the Menu for Hope III donation page. More details can be found at my post on this, Sam's at Becks & Posh, Adam's at The Amateur Gourmet, or Pim's at Chez Pim.
I hope you will consider visiting the Menu for Hope III Dontation Page and bidding on mine or many of the other contributions!
Menu For Hope III
Published by nika on at 7:15 AM.
For the winners of my prints and pinwheels who are visiting here - you do not need to register with blogger etc - just drop me an email at nika7k at yahoo dot com. After I verify your winning status, I will prepare and send your winning prize! Thanks again for bidding in the Menu For Hope!

If you have been cruising in food blogistan the past several days you likely know by now that the third annual food blog charity event called Menu For Hope III is currently running (Dec. 11 through 22). Last year this event raised $17,000 for UNICEF. According to Pim (Chez Pim) the donations are up to $10,000, and that was yesterday (Dec. 12), on the second day.
They have plenty of great prizes, including a chance at a meal of your life at the renown Tetsuya's in Sydney, the 2-Michelin Starred Manresa in California, Iggy's in Singapore, L'Atelier de Joël Robuchon in London, and more. They offer unique experiences, such as a chance to have coffee with Thomas Keller, or even a cup of tea with Harold McGee. There are also lots and lots of cookbooks, including signed and hard to find items. Also on offer are plenty of goodies from all corners of the world, scrumptious tours, and many other delicious experiences.
This is a very popular blog event. This year it is benefiting the World Food Programme. I like this charity, gave to it the day of the tsunami, I knew they would get the job done.
If you have a blog, blog about this. If you dont have a blog, send this info to your friends and family! (Details below)
I am going to borrow details on this important event from Sam at Becks & Posh and Pim at Chez Pim (who is the originator and main administratrix of the event). I hope its ok with Sam and Pim that I borrow and paraphrase. There are just so many details and I dont want to get it wrong!
What is the Menu for Hope?
Menu for Hope is an annual online Fundraising campaign hosted by food bloggers all over the world. Now in its third year, Menu for Hope was created by Pim Techamuanvivit. Food bloggers donate wonderful prizes in the hope that their readers will buy $10 raffle tickets to try and win one or more of the goodies on offer.
How much does a Raffle ticket cost?
A ticket costs $10 per entry, with funds going to the United Nations World Food Programme. You can enter as many times as you like, specifying the prize code for the item you want to win with each entry.
Where does the money go?
This year we are raising money for the United Nations World Food Programme. You can read more about this charity at their website.
What are all those UW letters and numbers about?
This year, to help with our automated raffle winner-picking software, we have assigned each prize with a four-digit code. On the west coast USA, all of the prizes start with a UW. Please make sure you use the code that matches the prize you are bidding for when you visit the First Giving site to make your donation.
So, how do I bid on a Prize?
Here's what you should do...
1. Go to the First Giving donation page.
2. Make a donation, each $10 will give you one raffle ticket toward a prize of your choice. Please specify which prize or prizes you'd like in the 'Personal Message' section in the donation form when confirming your donation. Do tell us how many tickets per prize, and please use the prize code -for example, a donation of $50 can be 2 tickets for UW01 and 3 for UW02.
3. If your company matches your charity donation, please remember to check the box and fill in the information so we could claim the corporate match.
4. Please also check the box to allow us to see your email address so that we could contact you in case you win. Your email address will not be shared with anyone.
5. Check back on Chez Pim on January 15 when we announce the result of the raffle. (The drawing will be done electronically. Our friend the code wizard Derrick at Obsession with Food is responsible for the wicked application that will do the job.)
Is there somewhere I can go to see all of the prizes in list form?
The organiser, Pim, will have the entire global list of Menu For Hope prizes on her blog.
Becks & Posh will be featuring all of the fabulous US west coast prizes in more detail throughout the campaign which lasts until December 22nd. Prizes will also be added during the campaign, so keep checking back with us.
How long do I have to make up my mind about which of all these amazing prizes I should bid for?
Bidding closes on December 22nd, so make sure you decide before then.
Is there any way I can donate a prize too?
If you live on the pacific west coast of the USA, please write to Sam at menu4hope.west@gmail.com, outlining the details of what your prize is, whether there are shipping restrictions, your name, your location, your blog name and your blog name url. She will then send you instructions on how to take part as well as a code number to use. Please wait for the code number before posting about your prize on your blog. Thank you.
If you are not situated in pacific coast USA, please contact the host who represnts your region instead:
# East Coast USA –Adam, the Amateur Gourmet - adrober at mac.com
# The rest of the US -Kalyn, Kalyn's Kitchen -kalynskitchen@comcast.net
# UK/Europe -David Lebovitz- davidlebovitz@hotmail.com
# Asia Pacific/Australia/New Zealand (Helen of Grab Your Fork - grabyourfork at yahoo.com.au)
# South America (Cooking Diva - pty_cooking_diva at yahoo.com)
# Canada (Jasmine at the Cardamom Addict - cardamomaddict at gmail.com).
Can I claim tax back when I make my donation?
Since this is a global event, with entries from many different countries, we suggest you contact a tax advisor in your own country to find out the answer to this question.
Where can I read about prizes from areas outside the west coast USA?
Aside from the west coast Prizes being promoted here at Becks & Posh check out the following:
US east coast: The Amateur Gourmet
US (the rest): Kalyn's Kitchen
Canada: Cardamom Addict
Europe and UK: Davidlebovitz.com
Asia Pacific/Australia/New Zealand: Grab Your Fork
And last but not least, our special wine blog host: Vinography
I don't live on the West Coast, can I still bid for these prizes?
There is nothing to stop you, except some of the prizes require pick up in a certain area and others have shipping restrictions. Please check with each individual prize sponsor for more details.
There you go! Rush on out, place your bids, have fun!
Too much of a good thing
Published by nika on Monday, December 11, 2006 at 9:36 AM.
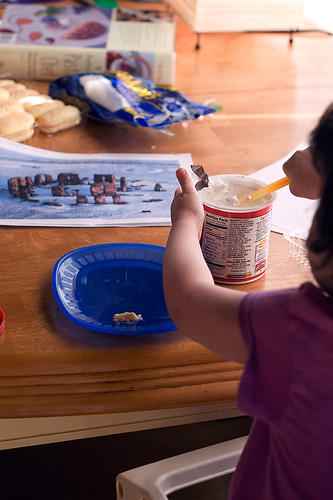
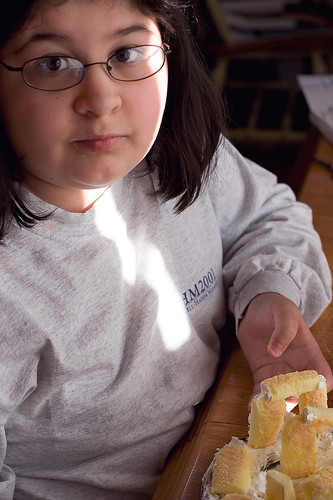
It is possible to have too much of a good thing. Its true, I proved it this weekend.
After a couple of weeks of baking cookies and other goodies and letting the kids taste test this and that, my 3 year old hit her wall. The picture above is exactly what it looks like when you hit the sugar-wall.
What lead to this look? Well, the following is just a sample. There is more incriminating evidence not published here. Thankfully, it ended with just the look and not, well, a loss of gastrointestinal integrity, to put it euphimistically.


Dont go here, hold back a bit on those sweets, pace yourself, for heaven's sake!
A better Irish Soda Bread
Published by nika on Friday, December 08, 2006 at 3:45 PM.
I have a love/hate relationship with Irish Soda Bread. The stuff you buy in the store here in New England around St Patrick's day is filled with raisins and caroway seeds, neither of which my family likes. I hate having to pick the seeds out of my teeth, even though they have a nice flavor.
Every recipe I have tried at home has given me pretty nasty dry crumbly bread that, although it sops up the juices from the New England boiled dinner ok, cloys up the mouth and ends up almost gagging me. Not a happy experience, I tell you.
Recently, my husband did the grocery shopping (always an experience in finding something novel in the grocery bag when he gets home) and he bought a corned beef brisket. With the weather finally getting cold around here, that was a perfect thing for supper.
Well, I went to make the same old Irish soda bread and saw that I had all I needed in the fridge, including the sour cream. A bit later, when I pulled the sour cream out, I realised it wasnt that at all but cottage cheese! I went with serendipity and made the most amazing soda bread yet!
So thats right, this recipe uses cottage cheese (large curd) instead of sour cream. Its so moist, doesnt fall to pieces, soaks up all the juices you would want and stays moist a good few days. Its a major plus that it doesnt cloy up and you dont have to extract it from the roof of your mouth like peanut butter (something that always happened with the other soda breads I have had.)
Try this recipe (below), let me know what you think!

Super Moist Irish Soda Bread Recipe (with a neat twist!)
Ingredients:
4 1/2 C All purpose flour
1/2 C sugar
1 tsp salt
1 tsp baking soda
2 tsp baking powder
2 eggs
1 1/4 C cultured buttermilk
1 C large curd cottage cheese
Directions:
1. Preheat oven to 350 F
2. Spray a 9 inch non-stick springform pan with flour-Pam.
3. In a large bowl, combine and sift all the dry ingredients (flour, sugar, salt, baking soda, baking powder).
4. In another bowl, beat the eggs with the buttermilk and then mix in the cottage cheese.
5. Slowly add the wet ingredients to the dry ingredients and mix with a spoon until the dough comes together.
6. In the large bowl, knead the dough enough to incorporate all the stray flour in the bowl (will be sticky).
7. Remove to the springform pan and place in the preheated oven.
Watch the color and allow to bake until it reaches the color you like (deep redish brown in my case) and then cover with foil for the remainder of the cooking time (65-70 mins total)
8. Remove from the oven and pop open the springform pan. Slide the bread onto a wire rack to cool. Can serve 8 large slices, 16 medium. Serve with butter!
9. Store in a plastic zip-lock bag.
Doping your food for beauty? Carbon Monoxide
Published by nika on Thursday, December 07, 2006 at 12:28 PM.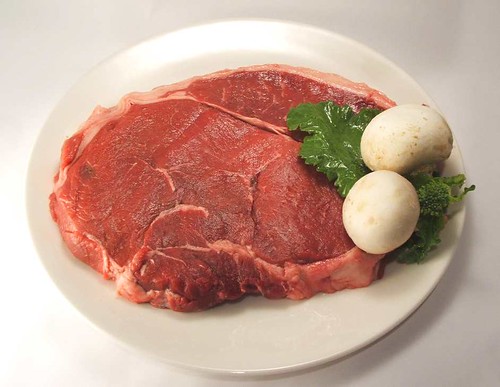
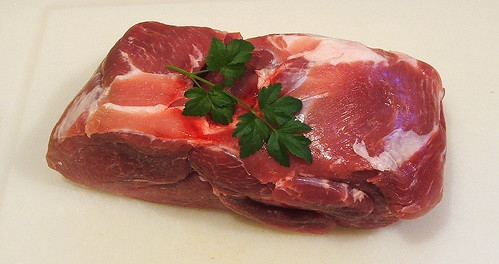
If you pay attention to the main stream or foodie news you will certainly have heard about how the US allows food suppliers to treat meat (beef, pork, even fish) with carbon monoxide to "preserve color" WITHOUT labeling the meat as such.
Carbon monoxide treated meat is pink and remains so, seemingly indefinitely. This is a treatment that does NOT prolong freshness or quality, it only gives the meat a permanent blush.
Thus, these producers are allowed to modify a major food source for purely cosmetic reasons with a poisonous gas and with no labeling requirement.
These are things you likely know. You likely also may have noticed that this same gas kills people every year when the winter season sets in. (40,000 people per year seek medical attention for carbon monoxide poisoning in the United States)
Often times what happens is a home is not being heated with approved systems (power goes out, owner/renter didnt pay bills so gas/electricity is cut off, etc) and someone decides to heat the place with a grill, inside, with no venting. What you get is dead people who are a very bright shade of red.
Why is it that your meat and those poor carbon monoxide victims are the same shade of red?
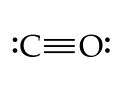
Carbon monoxide (CO) is composed of carbon and oxygen atoms. It is a product of incomplete combustion (like that grill). Most importantly, it has this very rude habit of acting like oxygen, going places where oxygen likes to frequent. What this means to us is that CO will poison or bind to hemoglobin in blood.
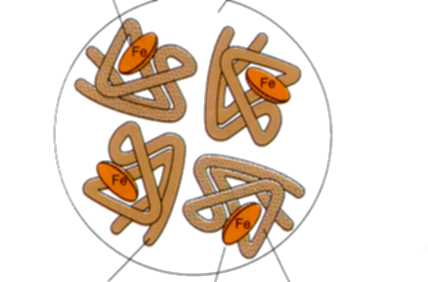
In fact, CO has an affinity for hemoglobin many 100s of times stronger than oxygen. That means that oxygen just doesnt have a chance. Once that CO nestles into the oxygen-pocket on the hemoglobin, its not going anywhere. If that CO is binding hemoglobin in our blood (while we are using it to transport oxygen from our lungs to our bodies) we die quickly.
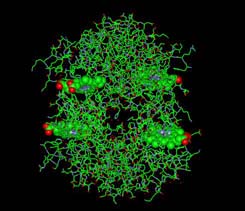
The Color Red.
When hemoglobin has no oxygen, it is not red. When it has oxygen as a co-pilot, its a bright red. The same thing happens when CO kicks out that oxygen and it hogs the ride. Not only that, it doesnt know when to leave, it stays bound to the hemoglobin long after it's welcome has worn out.
What that means to us carnivores eating unlabeled meat in the store is that meat (and blood), which would turn brown as oxygen releases from hemoglobins with time, remains permanently doped with CO. Humans, for 100s of thousands of years, have known intuitively when their meat has gone bad. Meat has a handy freshness indicator - the color red. When this is circumvented (not for safety or quality reasons but to fool you into thinking that the meat is fresh) we can not decide if meat is fresh or not.
As with many poorly understood legacy foodways, the use of red as an indicator of food quality may not be sufficiently appreciated.
Studies may have been done on the supposed safety of CO in meat but they did not assess real world realities like the importance of red as indicator to the consumer of product safety.
[Just FYI - the metric in these studies for safety was CO toxicity as it outgases from the meat upon opening the package and during cooking of the meat - dont take too close a whiff of your meat when you open it, let it out-gas for a few minutes before you figure out if its nice red AND slimey. Also try not to hover over your meat as it cooks, again with the outgassing.]
Studies by various meat industry positive researchers has suggested that CO treated meat doesnt go bad sooner or later than untreated meat. That is not the problem.
The problem liesin the fact that ALL MEAT will go bad, eventually. If you can not tell by using the color red then you have to wait until the putrefaction has advanced to the slime and stink stage.
There are no studies that I have been able to find that evaluate the advantages to the consumer of detecting early stages of putrefaction (and thus early significant health issues) through the red color indicator.
Putrefaction should be a consentual experience. If you want to age your meat, fine. You will also treat that meat differently than you would fresh bloody red meat. That is how you ensure your own health and safety.
If you have "fresh" bloody red meat and its actually several steps toward putrefaction further than you know, you might be in for a whole world of hurt when your GI tract reaps the benefits of poorly prepared aged meat.
The best way to get meat that has been treated the way YOU want it treated is to use an actual butcher who can tell you what you need to know about your meat (where its been and why).

Value-extended Gingerbreads - fun with frosting
Published by nika on Wednesday, December 06, 2006 at 11:55 AM.
As part of our holiday baking, we had to make gingerbread cookies. The holidays are not the same without that spicy aroma and their cheery little faces!
I didnt make up a recipe for this, I figured that this sort of thing had been optimized over the millenia of cookie baking. I used this somewhat elaborate recipe found at the Food Network. Its definitely worth the effort! Allow yourself 2 days to make this recipe (below).

When it came to frosting these guys, I wasnt sure what to do. I did a google image search to see how other people did this and I wasnt really inspired. I ended up simply playing with the tips I had and the frosting shapes they gave me. I did what I could (you can see what I ended up in the pics on this page) but soon felt I had exhausted my own concept of the traditional gingerbread cookie.

I started to go off onto other design tangents but desided that these cookies might want to stay in the more traditional realm.

Besides, it takes longer to decorate these guys than to eat them! Its for that very reason I could never be a cake designer. I cant stand to see it all eaten up without the care and love I would put into decorating the cake! Nothing less than prostrations and burnt offerings would salve the decorating goddess within (winks), not a good thing to ask of innocent party guests.

The following recipe is from the Food Network
Gingerbread Cookies 101
Recipe courtesy of Rick Rodgers, Christmas 101, Random House, 1999
The dough must be chilled for at least 3 hours and up to 2 days. The cookies can be prepared up to 1 week ahead, stored in an airtight container at room temperature. I had to bake many batches to finally accomplish the perfect gingerbread cookie. When the dough is rolled thin, it will bake crisp and almost crackerlike. Yet, when rolled thick (my preference), the cookies turn out plump and moist. In either case, the flavor will be complex and almost hot-spicy.
3 cups all-purpose flour
1 teaspoon baking soda
3/4 teaspoon ground cinnamon
3/4 teaspoon ground ginger
1/2 teaspoon ground allspice
1/2 teaspoon ground cloves
1/2 teaspoon salt
1/4 teaspoon freshly milled black pepper
8 tablespoons (1 stick) unsalted butter, at room temperature
1/4 cup vegetable shortening, at room temperature
1/2 cup packed light brown sugar
2/3 cup unsulfured molasses
1 large egg
Royal Icing (recipe follows)
Position the racks in the top and bottom thirds of the oven and preheat to 350 degrees F.
Sift the flour, baking soda, cinnamon, ginger, allspice, cloves, salt and pepper through a wire sieve into a medium bowl. Set aside.
In a large bowl, using a hand-held electric mixer at high speed, beat the butter and vegetable shortening until well-combined, about 1 minute. Add the brown sugar and beat until the mixture is light in texture and color, about 2 minutes. Beat in the molasses and egg. Using a wooden spoon, gradually mix in the flour mixture to make a stiff dough. Divide the dough into two thick disks and wrap each disk in plastic wrap. Refrigerate until chilled, about 3 hours. (The dough can be prepared up to 2 days ahead.)
To roll out the cookies, work with one disk at a time, keeping the other disk refrigerated. Remove the dough from the refrigerator and let stand at room temperature until just warm enough to roll out without cracking, about 10 minutes. (If the dough has been chilled for longer than 3 hours, it may need a few more minutes.) Place the dough on a lightly floured work surface and sprinkle the top of the dough with flour. Roll out the dough 1/8 inch thick, being sure that the dough isn't sticking to the work surface (run a long meal spatula or knife under the dough occasionally just to be sure, and dust the surface with more flour, if needed). For softer cookies, roll out slightly thicker. Using cookie cutters, cut out the cookies and transfer to nonstick cookie sheets, placing the cookies 1 inch apart. Gently knead the scraps together and form into another disk. Wrap and chill for 5 minutes before rolling out again to cut out more cookies.
Bake, switching the positions of the cookies from top to bottom and back to front halfway through baking, until the edges of the cookies are set and crisp, 10 to 12 minutes. Cool on the sheets for 2 minutes, then transfer to wire cake racks to cool completely. Decorate with Royal Icing. (The cookies can be prepared up to 1 week ahead, stored in airtight containers at room temperature.)
ROYAL ICING
1 pound (4 1/2 cups) confectioners' sugar
2 tablespoons dried egg-white powder
6 tablespoons water
Make ahead: The icing can prepared up to 2 days ahead, stored in an airtight container with a moist paper towel pressed directly on the icing surface, and refrigerated.
This icing hardens into shiny white lines, and is used for piping decorations on gingerbread people or other cookies. Traditional royal icing uses raw egg whites, but I prefer dried egg-white powder, available at most supermarkets, to avoid any concern about uncooked egg whites.
When using a pastry bag, practice your decorating skills before you ice the cookies. Just do a few trial runs to get the feel of the icing and the bag, piping the icing onto aluminum foil or wax paper. If you work quickly, you can use a metal spatula to scrape the test icing back into the batch.
Dried egg-white powder is also available by mail order from The Baker's Catalogue, 1-800-827-6836. Meringue powder, which is dehydrated egg whites with sugar already added, also makes excellent royal icing; just follow the directions on the package. However, the plain unsweetened dried egg whites are more versatile, as they can be used in savory dishes, too. Meringue powder is available from Adventures in Cooking (1-800-305-1114) and The Baker's Catalogue.
In a medium bowl, using a hand-held electric mixer at low speed, beat the confectioners' sugar, egg-white powder and water until combined. Increase the speed to high and beat, scraping down the sides of the bowl often, until very stiff, shiny and thick enough to pipe; 3 to 5 minutes. (The icing can be prepared up to 2 days ahead, stored in an airtight container with a moist paper towel pressed directly on the icing surface, and refrigerated.)
To pipe line decorations, use a pastry bag fitted with a tube with a small writing tip about 1/8-inch wide, such as Ateco No. 7; it may be too difficult to squeeze the icing out of smaller tips. If necessary, thin the icing with a little warm water. To fill the pastry bag, fit it with the tube. Fold the top of the bag back to form a cuff and hold it in one hand. (Or, place the bag in a tall glass and fold the top back to form a cuff.) Using a rubber spatula, scoop the icing into the bag. Unfold the cuff and twist the top of the bag closed. Squeeze the icing down to fill the tube. Always practice first on a sheet of wax paper or aluminum foil to check the flow and consistency of the icing.
Traditional Royal Icing: Substitute 3 large egg whites for the powder and water.

