Smells and Sounds of Home: Making Challah Bread with the Kids
Published by nika on Tuesday, July 11, 2006 at 11:03 AM.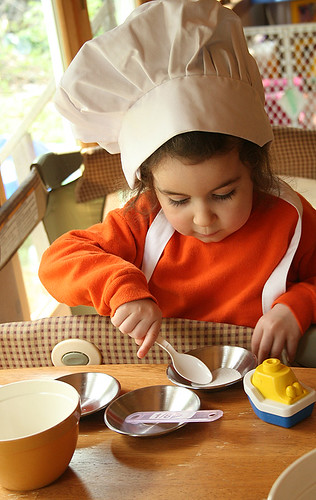
Recently I have been hankering to make bread. I usually make White Bread plus from The Joy of Cooking but this hankering was specific to a bread I had not made before – Challah.
Part of this comes from knowing a bit about the rich Jewish family traditions that surround this bread. Sure, its made well enough in bakeries around the world. It is also much more appreciated if it is made within the home, as part of the love that goes into the Friday evening meal. There is considerable religious context that surrounds the bread but it would be disingenuous for me to speak to that as I am not an observant Jew!
What I resonate most with is the conjuring of love, home, and hearth that comes from the making of this bread. Instead of buying a cooked loaf in a store somewhere made by strangers intent on profit, the bread baking in your own oven made by your own hands infuses it's beautiful aroma throughout the home, embracing everyone within with its promise of fellowship and simple joy of fresh homemade bread.
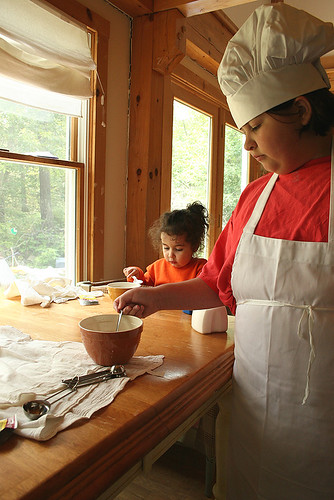
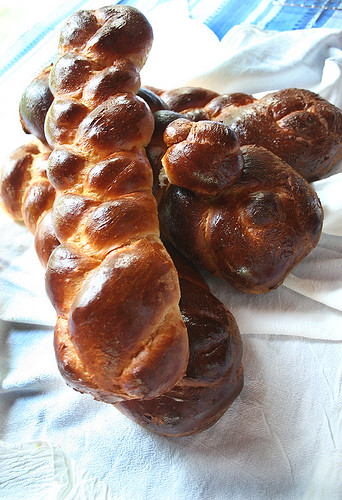
When I set out to make this bread I envisioned the happiness of sharing it with my family. What actually happened was that my daughters and I had a glorious engrossing afternoon of making dough, kneading it, braiding it, allowing it to rise, and then enjoying it's smells as it baked. What a wonderful magical afternoon! We will be eating challah for at least a week.
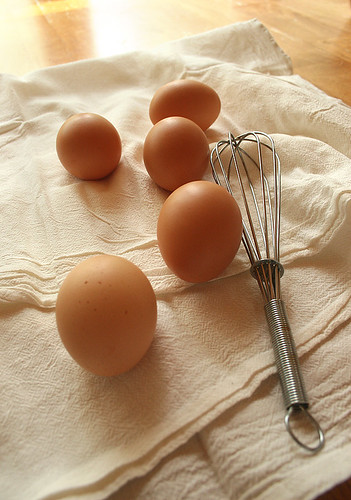
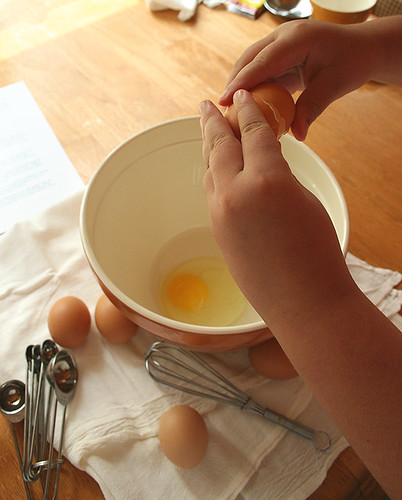
We used Joan Nathan's recipe for Challah bread. It can be found in her cookbook "The Jewish Holiday Baker". It is easy and quite forgiving! I used 5 eggs instead of the 4 called for by accident because this was the first time through this recipe (the 5th should be used as an egg wash). Do be watchful of the color of your bread as it bakes, mine was too dark before the recommended baking time, vagaries of the oven!
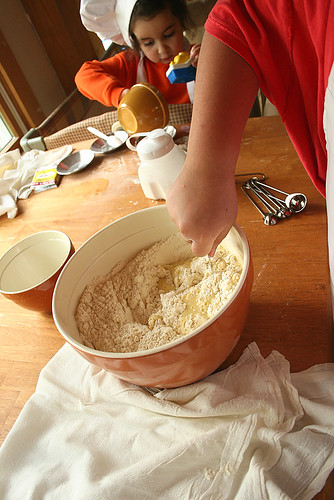
Now in Joan Nathan's voice with our photos and occasional notes (Note that my 9 year old daughter did all of the steps with her own two hands. The 2.5 year old also made her own little loaf, with a bit of help from her older sister.):
Challah Bread
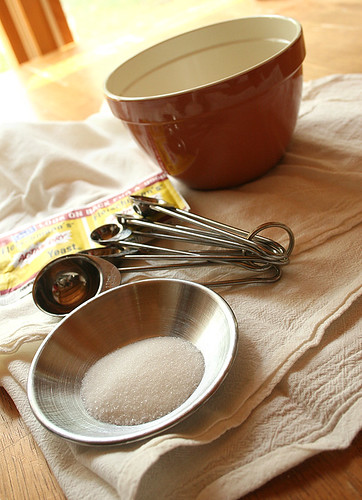
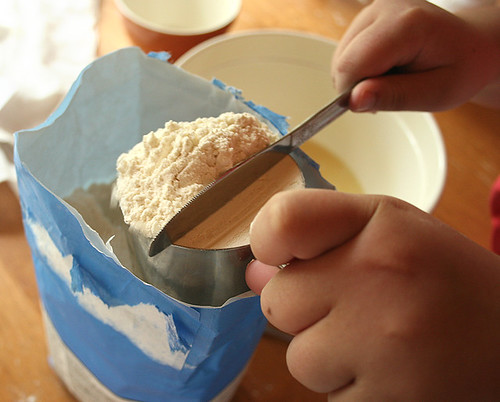
This recipe calls for two kinds of flour. Bread flour includes more gluten, helpful in the braiding. However, if you can find only all-purpose flour, use that. It also calls for 1/2 - 3/4 cup of sugar, because I like my challah less sweet than many challah eaters, even in my family! If you are going to use just one loaf, perform another mitzvah -- give away the second. If you are making a month of challahs, as I sometimes do, double the recipe and freeze several just after braiding them. Take them out of the freezer 5 hours before glazing and baking.
Ingredients:
1 scant tablespoon (1 package) active dry yeast
1 3/4 cups lukewarm water
1/2 to 3/4 cup sugar
1/2 cup vegetable oil
5 large eggs
5 cups bread flour
3 1/2 cups unbleached all-purpose flour, approximately
1 tablespoon salt
Poppy or sesame seeds for sprinkling
Directions:
Note: Technically, the separation of challah with a blessing, according to the Talmud, refers only to dough using flour that weighs at least 3 pounds 11 ounces. If the flour weighs less than 2 pounds 11 ounces, you do not have to separate the challah at all, and if it weighs more than 2 pounds 11 ounces and less than 3 pounds 11 ounces, you can separate it without a blessing. The challah is usually blessed after the flour, yeast, water, and other ingredients are mixed.
The dough:
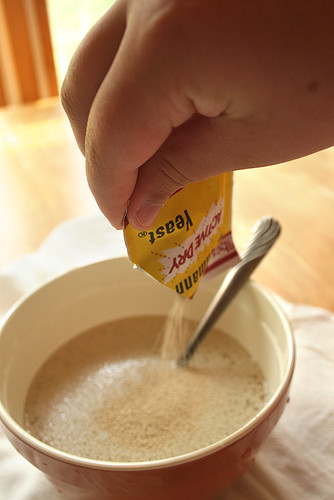
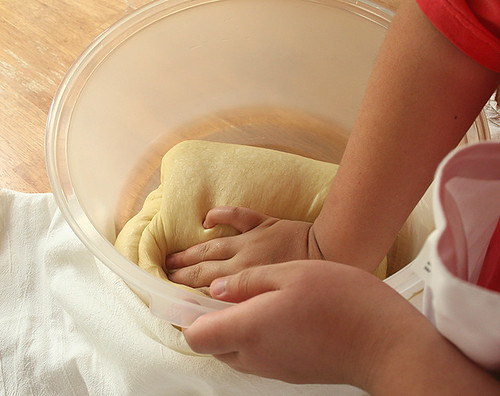
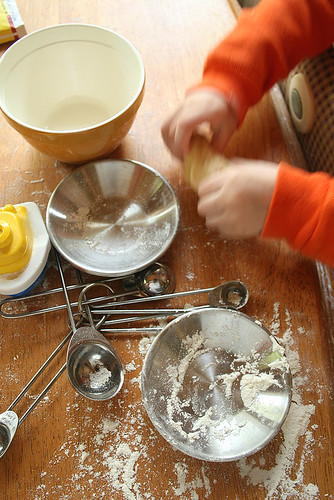
1. In a large bowl, dissolve the yeast in the warm water. Add the sugar and the oil and mix well with a whisk or a wooden spoon. Beat in 4 of the eggs, 1 at a time; then gradually stir in the bread flour, 2 cups of the all-purpose flour, and the salt. When you have a dough that holds together, it is ready for kneading.
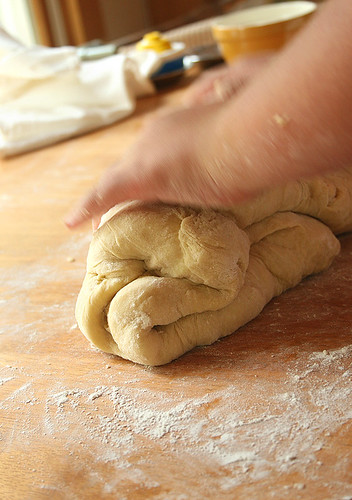
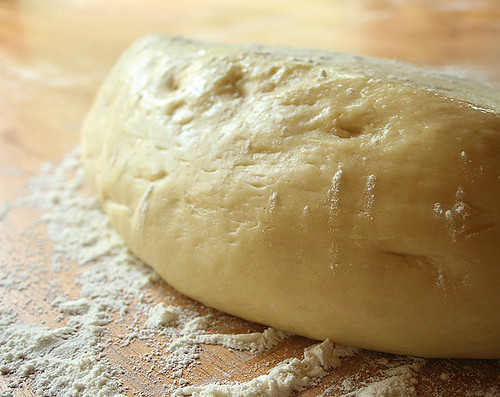
2. To knead by hand, place the dough on a lightly floured surface. Knead well, using the heels of your hands to press the dough away and your fingers to bring it back. Continue, turning the dough, for about 10 minutes, or until the dough is smooth and elastic, adding the remaining 1 1/2 cups of all-purpose flour or as needed.

To knead by machine in an electric mixer fitted with the dough hook, knead for 5 minutes on medium speed, or until smooth. You can also process half the dough at a time in a food processor fitted with the steel blade; process for about 1 minute.
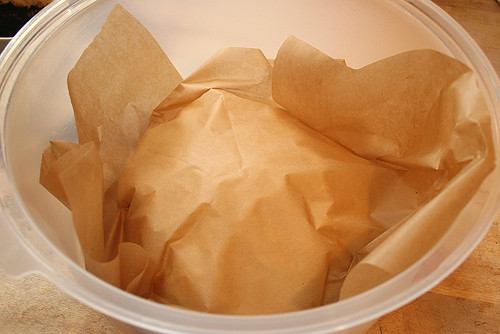
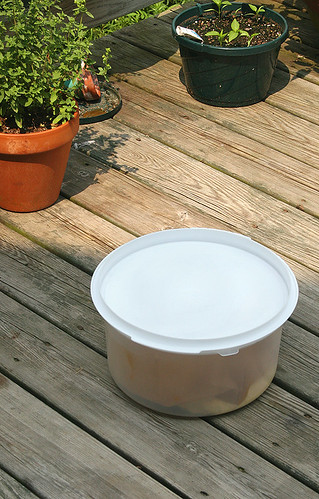
3. After kneading, place all the dough in a large oiled bowl, cover with plastic wrap, and let it rest in a warm place for 1 hour, until almost doubled in size. You can also put the dough in an oven that has been warmed to 150 degrees for a few minutes and then turned off.
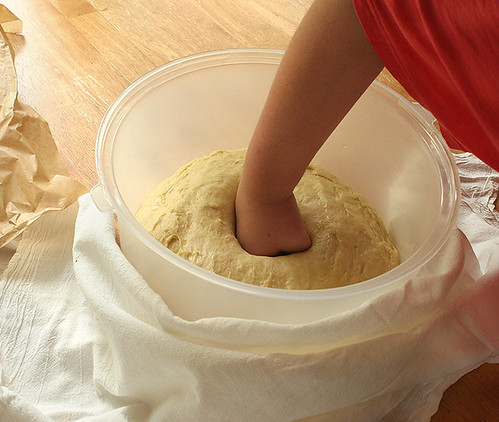
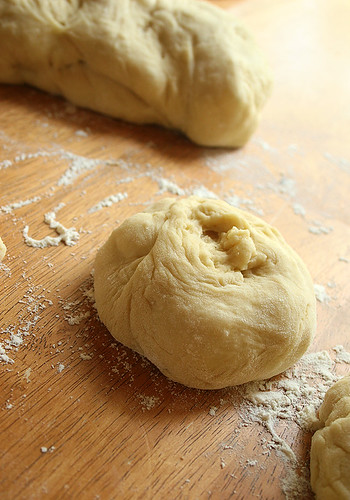
4. When the dough is almost doubled in size, remove it from the bowl and punch it down -- the rougher you are, the more the dough likes it. Return it to the bowl, cover it again and let it rise in a warm place for 30 minutes more. Or, if you have to go out, let the dough rise slowly in the refrigerator several hours or overnight and bring it to room temperature when ready to continue.
Braiding and baking the challah:
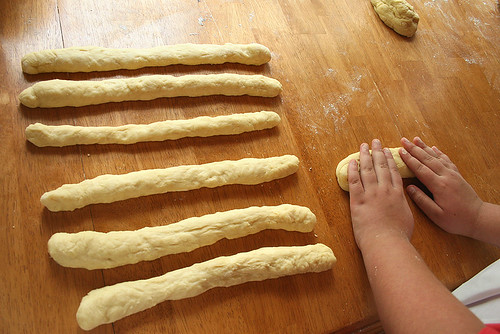
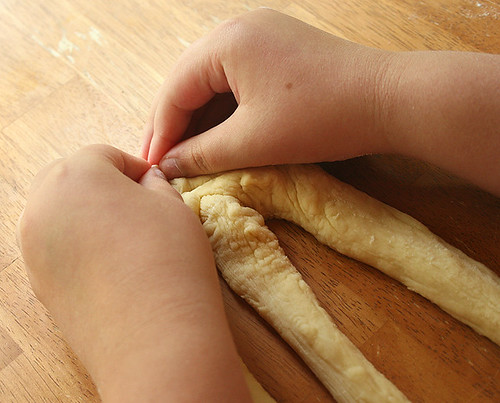
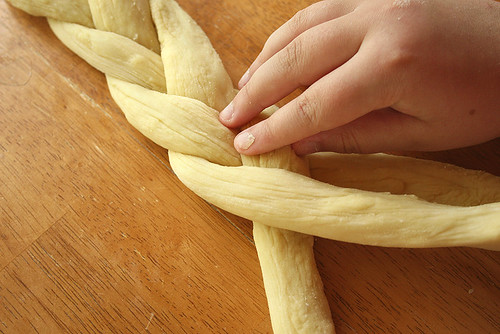
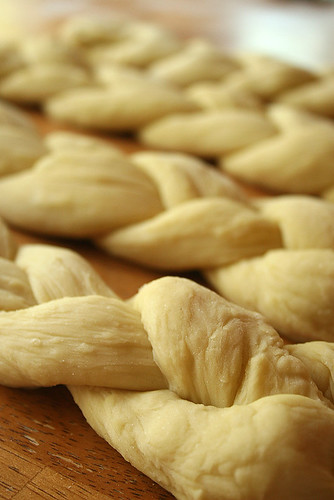
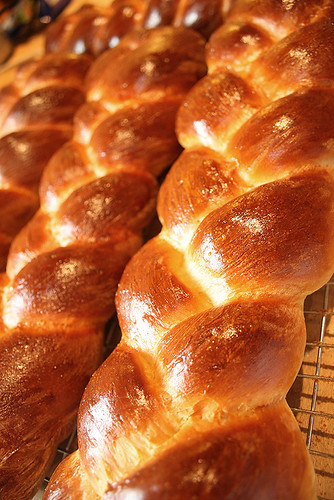
5. To make a 6-braided challah, take half the dough and form into 6 balls. Roll each ball with your hands into a strand about 14 inches long and 1 1/2 inches wide. Pinch the strands together at one end and then gently spread them into 2 groups of 3.
Next, take the outside right strand over 2 to the middle empty space. Then, take the second strand from the left to the far right. Regroup to 3 on each side. Take the outside left strand over 2 to the middle and the second strand from the right over to the far left.
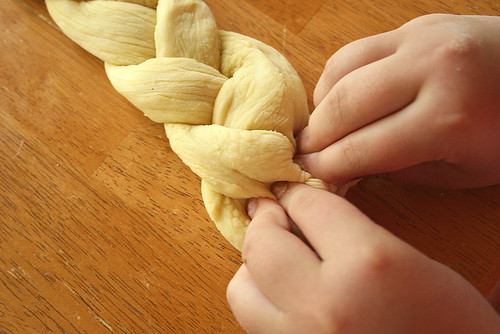
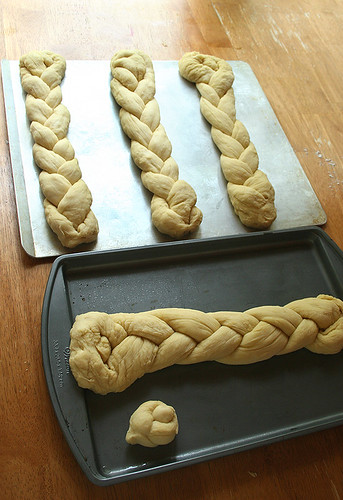
Continue this method until all the strands are braided. The key is to always have 3 strands on each side so that you can keep your braid balanced. Make a second loaf the same way. Place the braided loaves in greased 10- by 4-inch loaf pans or on a greased cookie sheet with at least 2 inches in between.
To make loaves symbolizing the 12 shewbread, the consecrated loaves placed on the altar in the Temple of Jerusalem, shape one half of the dough into 12 tight balls and press them together in the bottom of a greased 10- by 4- inch loaf pan. Repeat with the second half of the dough in another pan.
We chose the simpler method of just three stranded loaves:
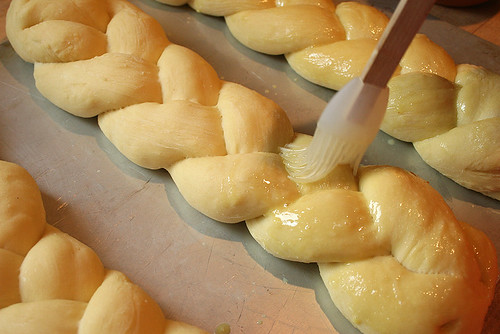
6. Let the challah loaves rise another hour, uncovered. Fifteen minutes before putting the loaves in the oven, beat the remaining egg and brush it gently over them. Five minutes later, lightly brush them again. Then sprinkle with poppy or sesame seeds and let dry a few minutes.
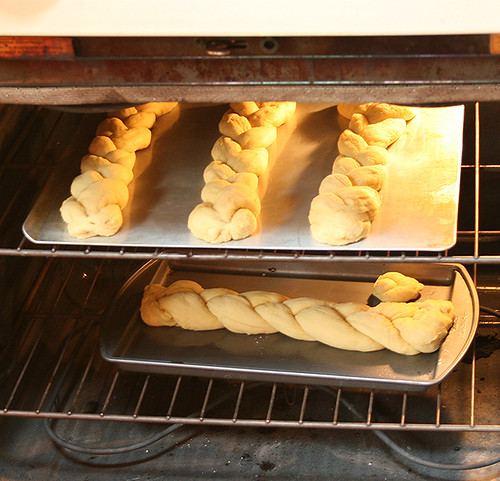
7. Preheat the oven to 400 degrees. Bake the loaves on the middle rack of the oven for 10 minutes. Then reduce the temperature to 375 degrees and bake for 30 minutes more. Turn off the oven and leave the loaves in 5 minutes longer to get a dark-golden crust. Remove and cool on a rack.
Yield: 2 loaves
I say make this bread with your family as soon as you can get it together.
Books of Note:
Technorati taggage:
baking, bake, challah, bread, jewish, nathan, joan, children, kids, recipe, DIY, yeast, cooking.


Links to this post