Happy New Years 2006!!
Published by nika on Saturday, December 31, 2005 at 7:43 PM.
Site changes
Published by nika on at 3:20 PM.
Changes are coming, 3 columns, brighter colors.
Just messing around in the kitchen :-) Hope you all like.
Just messing around in the kitchen :-) Hope you all like.
Empanadas - The Recipe
Published by nika on Friday, December 30, 2005 at 11:26 AM.
EMPANADAS
Deep-fried meat pastries. These are served as appetizers because they will not keep their crispness for more than 1/2 hour. In other words, as you fry them, have someone serve them to your guests. As the guests bite into them, they may squirt lime juice into them from cut-up limes, or they may spoon "pique" (recipe follows) sauce into the bitten-off empanada. You may not want to "fill-up" the guests on these if you are planning on more food. Otherwise, if it is just an Empanada Party, make lots of them along with fried yuca and patacones, serve up with lots of cold beer, coke or margaritas!
Ingredients:
1 lb of lean pork meat (1 lb of dark turkey thigh meat, or a turkey roast that has mostly dark meat in it) two large red potatoes
two eggs
small onion
2 cloves cut up garlic
1/2 packet "sazon con achiote", this is for yellow color(latino food store)
bay leaf
1 tsp ground comino
salt
Directions:
Place meat , potatoes and eggs in enough water to cover them. Add the small cut up onion, garlic, 1/2 packet of "sazon", bay leaf, cominos and salt. Bring to boil, then lower to simmer. In about 1/2 hour when the potatoes are tender and the eggs are hard boiled, remove them. Simmer the meat for at least another hour. Remove meat and cool completely.
Preparation of the meat filling:
Grind the cooked meat in a food grinder, or in a food processor. Chop the potatoes and the eggs finely. Add the eggs and potatoes to the ground meat. Now you must prepare a spicy "hogao" sauce to add to the meat mixture.
Hogao
Ingredients:
2 large tomatoes, finely chopped
4 green onions, finely chopped
3 cloves garlic, minced
1 tblsp of cilantro, minced
1/2 tsp. ground comino
1/2 tsp. of "sazon con azafran"
salt to taste
3 tblsp of olive oil
Directions:
Heat oil in a saucepan and add all of the ingredients. Cook over medium heat until everything is mushy. Add this "hogao" sauce to the meat mixture. You will need to add some broth left over from cooking the meat, in order to get the meat filling moist. You don't want the filling to be dry.
Preparation of the corn dough:
2 cups of yellow "masa-harina" La Venezolana or ArepaHarina Colombiana corn meal (Latino Food Store) This is NOT the same masa-harina "Quaker" Mexican style! Salt to taste 3 cups of boiling water, plus a tablespoon of brown sugar. (broth is better but if you have run out, make a broth with chicken bullion cubes) Pour the boiling hot broth in a heat proof container, stirring constantly, slowly pour in the 2 cups of "ArepaHarina", this will get pretty thick and hard to stir towards the end. Try to knead it as much as you can with the spoon, but eventually, as the dough cools, you can knead it with your hands. When the dough looks pretty smooth, about 5 minutes of kneading, cover it with a plastic or moist towel to keep it from drying out.
In a heavy deep frying pan, pour about 3 inches of oil. (If you were going to do this in Colombia, it would be LARD! ) Start heating the oil over medium/high heat.
Shape dough into the size of small golf balls. You can do this golf ball shaping ahead of time as long as you keep them covered.
How to make Empanadas:
See pictures.
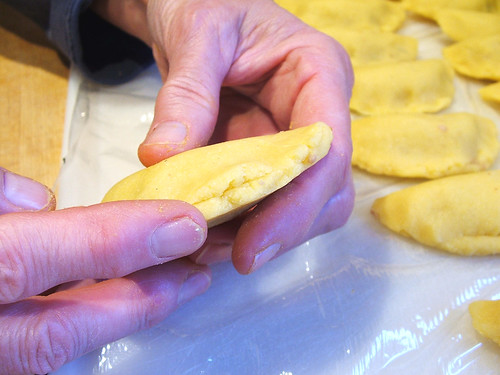
Flatten a ball with a flat object such a a plate sprayed with Pam, also spray the surface underneath. Place a heaping tablespoon of meat filling on one hemisphere of the flattened dough. Fold the other half over and pinch together so that there is NO opening showing any filling. The trick here is to get as much meat mixture inside of minimum dough. This will take practice. Otherwise, your empanadas might have more dough to them than meat! Place carefully in the hot oil and fry until golden brown. Drain on papers towels and serve immediately with lime quarters or "pique" sauce.
PIQUE SAUCE
This sauce/relish is similar to "pico de gallo" except it does not include the minced jalapeno. If you want to use jalapeno, you can, but it's not legitimate Colombian. As I said before, this relish is spooned into a bitten-off empanada. Yummmm!
Ingredients:
6 cleaned green onions
3 cloves garlic
1/4 cup of fresh lemon juice
1/4 cup of minced cilantro
1 tsp of ground comino
1/8 cup of sugar
1/2 cup of white vinegar
salt to taste
Directions:
Finely mince the green onions and the garlic. Add the other ingredients and let marinate for at least 2 hours. There should be enough liquid to almost reach the top of the relish. You may have to adjust by adding a little more vinegar.
These preparations are "labor intensive", so you must prepare some of them at least two days or more in advance of your party or freeze them. If you freeze the empanadas, keep them separate while freezing but let them thaw out 1/2 an hour before frying them.
Copyright 2005 nika7k at yahoo dot com
Related Posts:
Deep-fried meat pastries. These are served as appetizers because they will not keep their crispness for more than 1/2 hour. In other words, as you fry them, have someone serve them to your guests. As the guests bite into them, they may squirt lime juice into them from cut-up limes, or they may spoon "pique" (recipe follows) sauce into the bitten-off empanada. You may not want to "fill-up" the guests on these if you are planning on more food. Otherwise, if it is just an Empanada Party, make lots of them along with fried yuca and patacones, serve up with lots of cold beer, coke or margaritas!
Ingredients:
1 lb of lean pork meat (1 lb of dark turkey thigh meat, or a turkey roast that has mostly dark meat in it) two large red potatoes
two eggs
small onion
2 cloves cut up garlic
1/2 packet "sazon con achiote", this is for yellow color(latino food store)
bay leaf
1 tsp ground comino
salt
Directions:
Place meat , potatoes and eggs in enough water to cover them. Add the small cut up onion, garlic, 1/2 packet of "sazon", bay leaf, cominos and salt. Bring to boil, then lower to simmer. In about 1/2 hour when the potatoes are tender and the eggs are hard boiled, remove them. Simmer the meat for at least another hour. Remove meat and cool completely.
Preparation of the meat filling:
Grind the cooked meat in a food grinder, or in a food processor. Chop the potatoes and the eggs finely. Add the eggs and potatoes to the ground meat. Now you must prepare a spicy "hogao" sauce to add to the meat mixture.
Hogao
Ingredients:
2 large tomatoes, finely chopped
4 green onions, finely chopped
3 cloves garlic, minced
1 tblsp of cilantro, minced
1/2 tsp. ground comino
1/2 tsp. of "sazon con azafran"
salt to taste
3 tblsp of olive oil
Directions:
Heat oil in a saucepan and add all of the ingredients. Cook over medium heat until everything is mushy. Add this "hogao" sauce to the meat mixture. You will need to add some broth left over from cooking the meat, in order to get the meat filling moist. You don't want the filling to be dry.
Preparation of the corn dough:
2 cups of yellow "masa-harina" La Venezolana or ArepaHarina Colombiana corn meal (Latino Food Store) This is NOT the same masa-harina "Quaker" Mexican style! Salt to taste 3 cups of boiling water, plus a tablespoon of brown sugar. (broth is better but if you have run out, make a broth with chicken bullion cubes) Pour the boiling hot broth in a heat proof container, stirring constantly, slowly pour in the 2 cups of "ArepaHarina", this will get pretty thick and hard to stir towards the end. Try to knead it as much as you can with the spoon, but eventually, as the dough cools, you can knead it with your hands. When the dough looks pretty smooth, about 5 minutes of kneading, cover it with a plastic or moist towel to keep it from drying out.
In a heavy deep frying pan, pour about 3 inches of oil. (If you were going to do this in Colombia, it would be LARD! ) Start heating the oil over medium/high heat.
Shape dough into the size of small golf balls. You can do this golf ball shaping ahead of time as long as you keep them covered.
How to make Empanadas:
See pictures.
Flatten a ball with a flat object such a a plate sprayed with Pam, also spray the surface underneath. Place a heaping tablespoon of meat filling on one hemisphere of the flattened dough. Fold the other half over and pinch together so that there is NO opening showing any filling. The trick here is to get as much meat mixture inside of minimum dough. This will take practice. Otherwise, your empanadas might have more dough to them than meat! Place carefully in the hot oil and fry until golden brown. Drain on papers towels and serve immediately with lime quarters or "pique" sauce.
PIQUE SAUCE
This sauce/relish is similar to "pico de gallo" except it does not include the minced jalapeno. If you want to use jalapeno, you can, but it's not legitimate Colombian. As I said before, this relish is spooned into a bitten-off empanada. Yummmm!
Ingredients:
6 cleaned green onions
3 cloves garlic
1/4 cup of fresh lemon juice
1/4 cup of minced cilantro
1 tsp of ground comino
1/8 cup of sugar
1/2 cup of white vinegar
salt to taste
Directions:
Finely mince the green onions and the garlic. Add the other ingredients and let marinate for at least 2 hours. There should be enough liquid to almost reach the top of the relish. You may have to adjust by adding a little more vinegar.
These preparations are "labor intensive", so you must prepare some of them at least two days or more in advance of your party or freeze them. If you freeze the empanadas, keep them separate while freezing but let them thaw out 1/2 an hour before frying them.
Copyright 2005 nika7k at yahoo dot com
Related Posts:
- How-2 guide on how to make Platanos (fried plantains or tostones)
- Yucas Fritas (Fried Yucas or Cassava Root) Recipe and How 2 photos
- Empanadas - The Recipe
- Flash Flickr Movie of How to make Colombian Empanadas
- Chicharron - Deep fried pork belly - How To
- How to make Colombian Empanadas - directions
- Latest full recipe for Colombian Bunuelos (2006 post)
- Last year's Christmas Bunuelo Decadence
- A Colombian breakfast How-2 guide
- Colombian Frescos
- Lechona preparation
How to make Colombian Empanadas - directions
Published by nika on Thursday, December 29, 2005 at 8:53 AM.
Colombian empanadas, filled with a divine pork stuffing, deep fried, and served immediately with pique (onions, cilantro, onions, garlic, vinegar) and limes.
In this previous post you will see a Flickr Flash slideshow on how Colombian empanadas are made!
The directions you see in this post can also be sourced by clicking on these images, the images in the flash show, and also by going to the flickr page for that step.
Enjoy!
(Please remember that these directions and all photos used are copyrighted and only for use with expressed permission by myself.)
Empanada Step 1 - Stock: Step 1
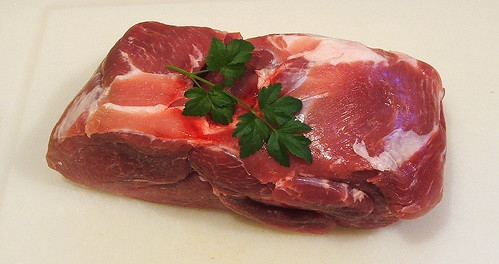
The meat we use here is a pork butt. Cut it up and put in stock pot. Remove the skin and fat to be used for chicharrones.
Empanada Step 2 - Stock: Step 2
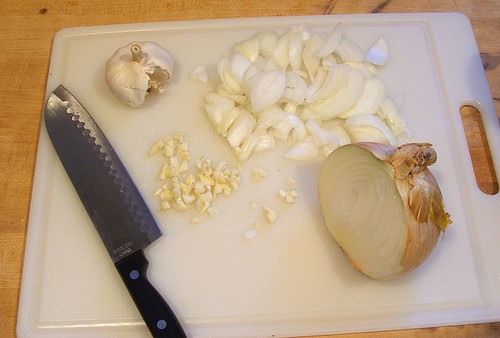
Garlic and onions are diced and added to the stock pot.
Empanada Step 3 - Stock: Step 3
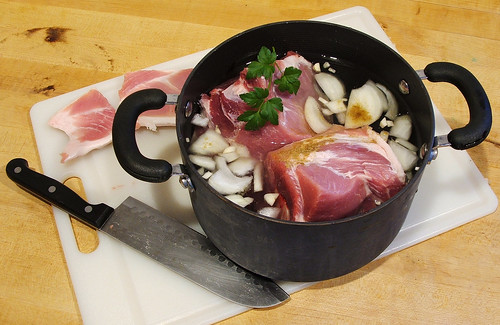
Add onions, cominos (cumin), potatoes, an egg, and garlic to the pork in the stock pot.
Empanada Step 4 - Stock: Step 4
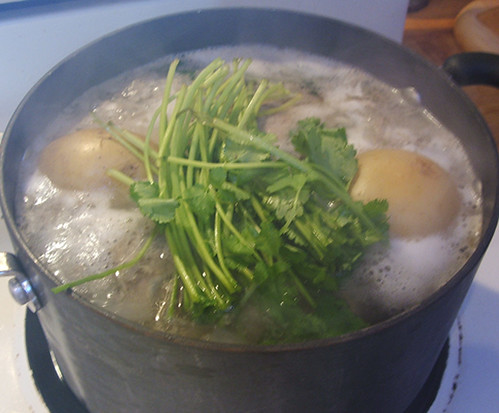
Simmer, add cilantro towards the middle of the simmer. Continue until a nice stock is made.
Empanada Step 5 - Stock: Step 5

Remove pork from boiling stock and cool.
Empanada Step 6 - Filling: Step 1
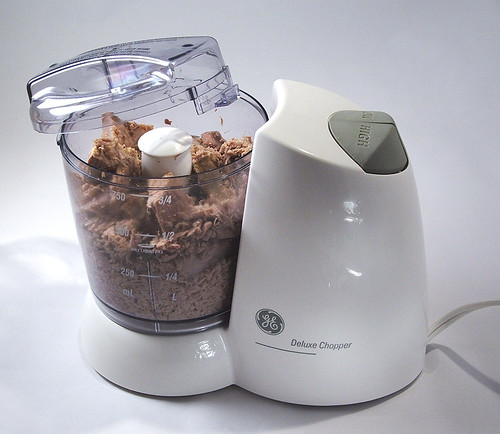
Boiled pork is minced. Set aside.
Empanada Step 7 - Filling: Step 2
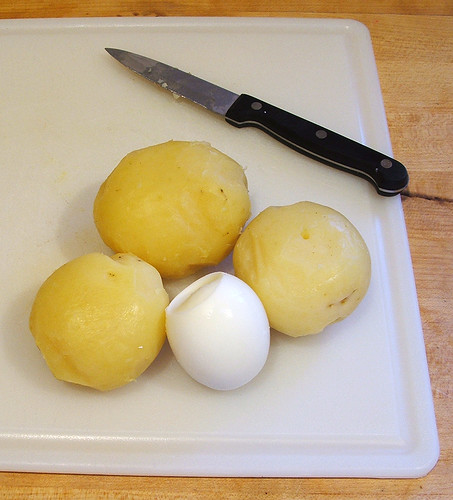
Boiled potatoes and egg are removed and allowed to cool until you can work with them.
Empanada Step 8 - Filling: Step 3
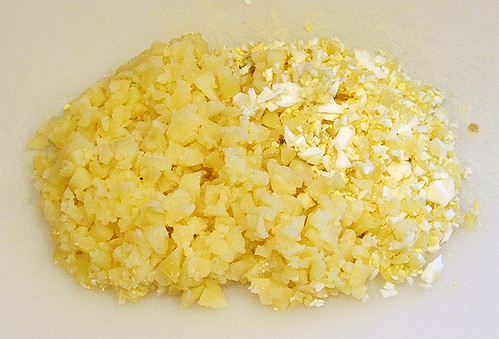
Chop potatoes and egg into small dice. Set Aside.
Empanada Step 9 - Filling: Step 4 - Hogao: Step 1
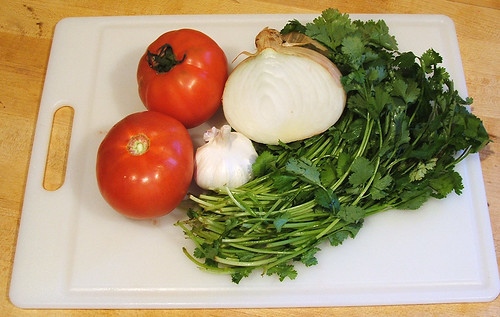
This delicious spread and starter for many Colombian foods is made from tomatoes, onions, garlic, and lots of cilantro. This will be part of the filling.
Empanada Step 10 - Filling: Step 5 - Hogao: Step 2
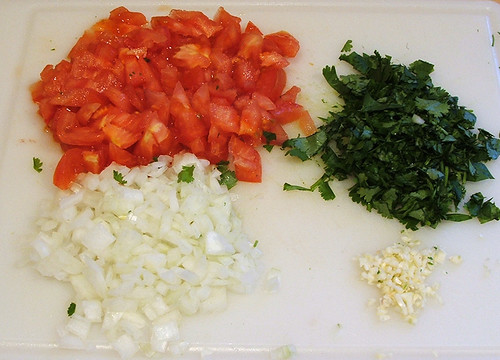
Chop the tomatoes, onions, garlic, and cilantro.
Empanada Step 11 - Filling: Step 6 - Hogao: Step 3
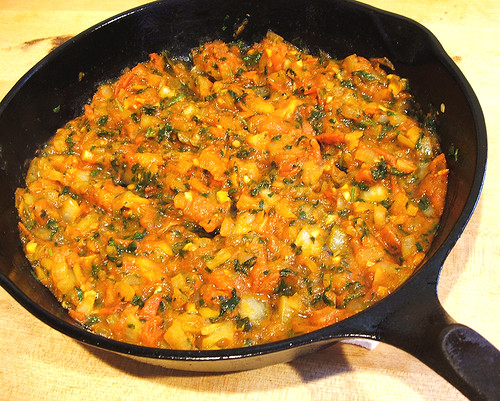
Saute these ingredients in a small amount of olive oil until they are soft and melding together. Set aside.
Empanada Step 12 - Filling: Step 8

Mix together: diced egg, diced potatoes, minced pork, and hogao. Set aside. (Can be frozen)
Empanada Step 13 - Masa Harina: Step 1

Masa Harina (very finely milled corn meal, do not try to use the usual meal in the store, go to a latino market and tell them what you are making), salt, agua de panela (colombian brown sugar chunks - shown in the bottom middle - is dissolved in water), and some of the well degreased stock from the earlier stock pot are combined while the stock is very hot (just cool enough to handle - that would depend on how tough your hands are).
Empanada Step 14 - Masa Harina: Step 2
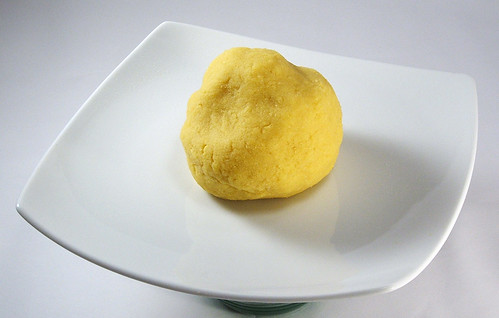
The dough comes together in a tidy ball, not too sticky and not too dry.
Empanada Step 15 - Formation overview

A quick overview of the size and shape of the wrapping of the filling.
Empanada Step 16 - Formation: Step 1: Wrap process
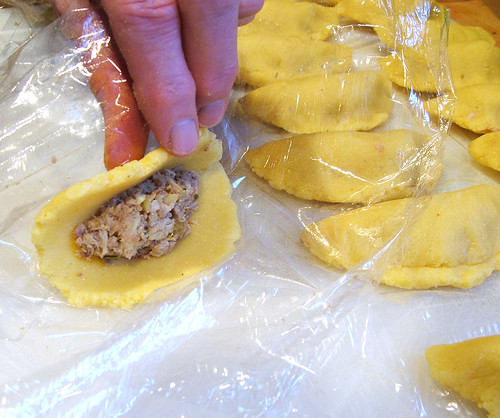
Using some plastic wrap (or slightly wet hands for the expert), begin to gently bring the masa over the filling.
Empanada Step 17 - Formation: Step 2: Wrap process
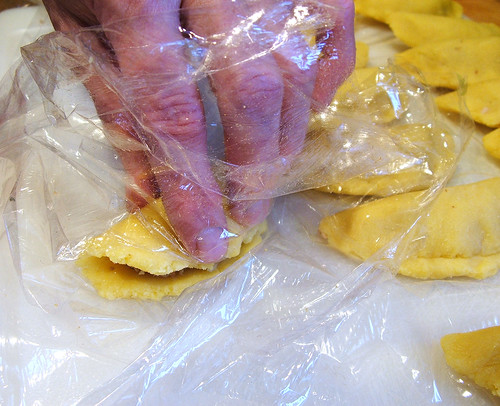
Continuing with the plastic wrap, bring edges towards each other. Do not do this in such a way that the masa is made thinner or has holes. You want the masa to be the same thickness all over.
Empanada Step 18 - Formation: Step 3: Wrap process
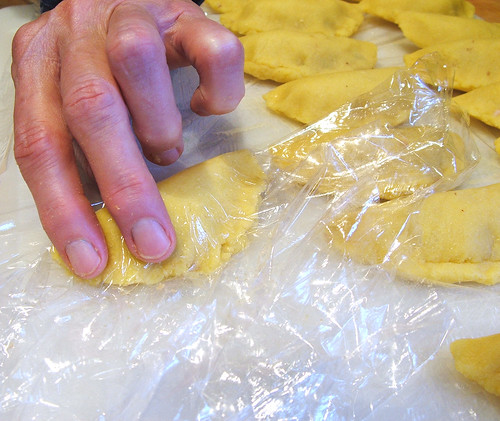
Very gently pinch the edges together, without thinning the edges much.
Empanada Step 19 - Formation: Step 4: Wrap process
Continuing with a gentle hand, gently seal the edges so that there are no openings or creases. If this is not done well, the filling will come out and a bad empanada results.
These are ready to be deep fried in medium high heat. Fry until golden brown. See picture at end of this post
The following are directions to make the "salsa" that we Colombians put on/in our empanadas.
Empanada Step 20 - Pique: Step 1
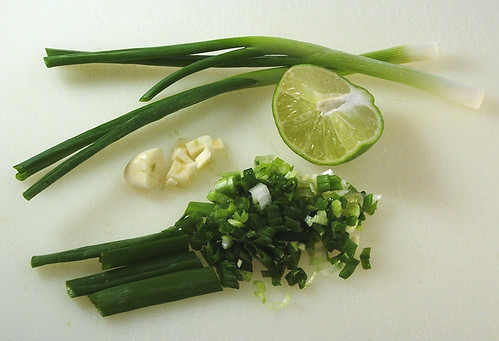
Chop green onions and garlic.
Empanada Step 21 - Pique: Step 2

Add chopped cilantro, cumin, and salt to the onion, garlic mix, add vinegar, set aside till serving empanadas.
Empanada Step 22 - Pique: Step 3


Serve on your empanadas!
Empanada Step 23 - The Hard Part - Not eating all of them before your guests!
Serve these hot and right away. These are meant to be made, fried, and eaten the same day. Usually, a helper/partner is very useful.
Technorati tags: Empanada, Pique, recipe, directions, cookbook, cooking, fried foods, latino, DIY, Colombia, Colombian, Flickr, Flash, slideshow.
Related Posts:
- How-2 guide on how to make Platanos (fried plantains or tostones)
- Yucas Fritas (Fried Yucas or Cassava Root) Recipe and How 2 photos
- Empanadas - The Recipe
- Flash Flickr Movie of How to make Colombian Empanadas
- Chicharron - Deep fried pork belly - How To
- How to make Colombian Empanadas - directions
- Latest full recipe for Colombian Bunuelos (2006 post)
- Last year's Christmas Bunuelo Decadence
- A Colombian breakfast How-2 guide
- Colombian Frescos
- Lechona preparation
The making of Colombian Empanadas
Published by nika on Wednesday, December 28, 2005 at 9:57 AM.Here is a Flickr Flash slideshow on how Colombian empanadas are made!
Will be putting step by step directions in this post in a few (check back). Those same directions can be sourced by clicking on the flash show and going to the flickr page for that step.
Enjoy!
Technorati tags: Empanada, Pique, recipe, directions, cookbook, cooking, fried foods, latino, DIY, Colombia, Colombian, Flickr, Flash, slideshow.
Related Posts:
- How-2 guide on how to make Platanos (fried plantains or tostones)
- Yucas Fritas (Fried Yucas or Cassava Root) Recipe and How 2 photos
- Empanadas - The Recipe
- Flash Flickr Movie of How to make Colombian Empanadas
- Chicharron - Deep fried pork belly - How To
- How to make Colombian Empanadas - directions
- Latest full recipe for Colombian Bunuelos (2006 post)
- Last year's Christmas Bunuelo Decadence
- A Colombian breakfast How-2 guide
- Colombian Frescos
- Lechona preparation
The pause that refreshes
Published by nika on Tuesday, December 27, 2005 at 8:11 AM.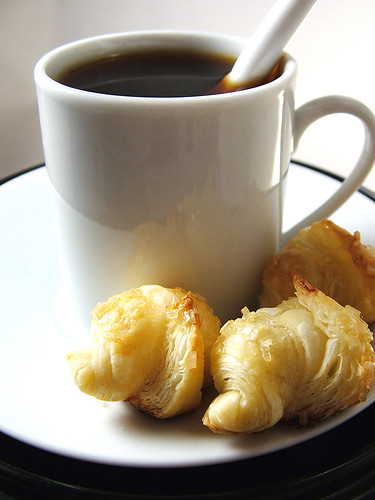
Made these micro-croissants and had to share. They are about as large as the first digit on your pinky finger! Closeup of the demitasse cup makes this shot seem something its not.
Related Posts
Nanopublishing - exquisitely responsive publishing
Published by nika on Monday, December 26, 2005 at 8:10 PM.
Just to post something NOT graphically dense - *smiles* - I am initiating a nanopublishing or thin media project that will hopfully feed the soul (mine and yours :).
In the coming months I hope to launch several nanopublications that will be "print on demand". Essentially, I will be assembling, formatting, and deploying small accessible how-to books on topics which I enjoy and which I shoot. This will start with Colombian recipes but will also include other food topics as the project evolves and as per interest by you, the reader. I am currently doing the due diligence on the right on-demand publication and order fulfillment house.
Profits from this project will go towards a much needed upgrade in my camera (as in a real DSLR camera with the right accoutrements) and, should it really get going, towards a 9 months photography certificate from the Center for Digital Imaging Arts at Boston University.
Most of all, its a chance to be creative with my photos and my cooking. What more can anyone ask for?
Chicharron - Deep fried pork belly - How To
Published by nika on at 9:17 AM.
Many cultures across the world rely on the pig for protein, Colombians included. One of the most delectable dishes is Chicharron (fried pork skins). This is nothing like the fried pork rinds that you buy in the store in the Atkins Low Carb Section. This is not made with the salt pork you can find in the meat isle. This is made from fresh pork belly and a cut that doesnt include much meat (the meat doesnt really hold up well to the process, its the fat that counts here).
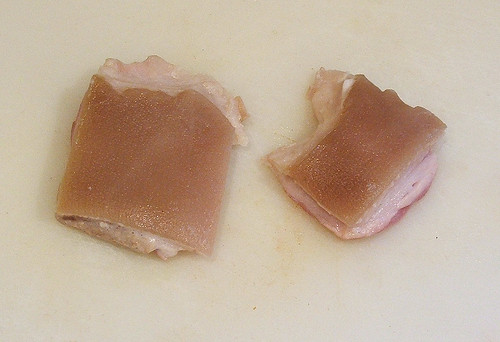
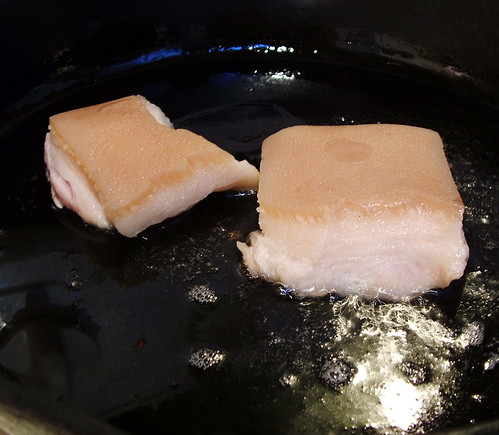
During our holiday food festivties, we were not interested in huge quantities of chicharron but a taste. Below is a photo of some pork skin that we removed from a pork butt that we were using for a stock for empanadas. The skin is in the upper left corner, skin side down.
Step 1:
This skin is cut into smaller squares and placed in a pan with water and a tablespoon or so of baking soda. The skin-side is placed down and they are simmered for about 10 minutes. This step conditions the skin so that it fries up correctly.
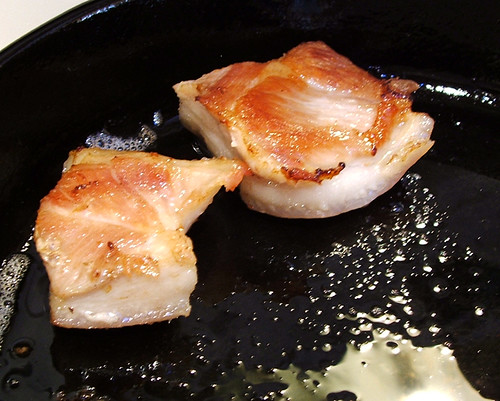
Step 2:
These boiled pieces are placed in a pan with cool oil meat side down. Keep the temperature low. This step begins to render the fat and brown the meat.
Step 3:
With the temperature still in the medium range, flip the pieces over so that the skin side is down. Make sure that enough fat has rendered out so that the skin doesnt stick to the pan. I would NOT suggest teflon (high heat causes teflon to outgas toxins) and DO suggest a nicely seasoned cast iron pan like you see in these photos.
Step 4:
Bring the temp up slowly and cook until the skin is crispy, as shown below. Remove and cool enough to serve.
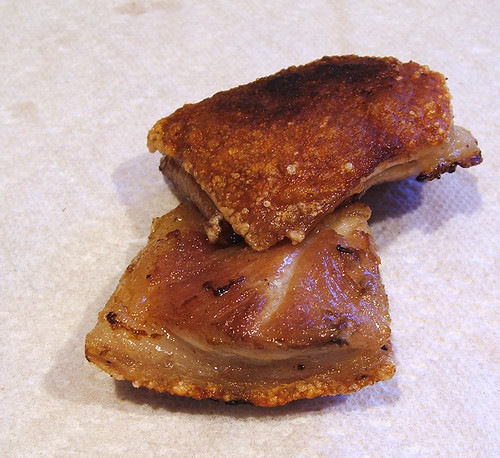
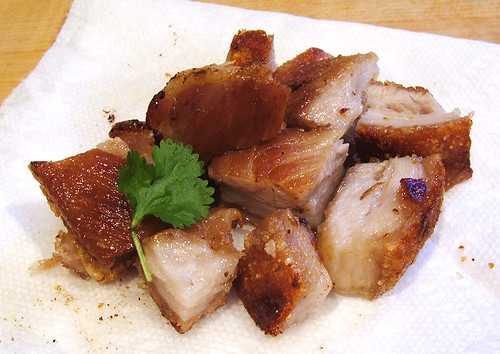
Step 5:
Once cool enough to handle, cut into smaller pieces, salt to taste, serve with slices of lime.
Related Posts:
During our holiday food festivties, we were not interested in huge quantities of chicharron but a taste. Below is a photo of some pork skin that we removed from a pork butt that we were using for a stock for empanadas. The skin is in the upper left corner, skin side down.
Step 1:
This skin is cut into smaller squares and placed in a pan with water and a tablespoon or so of baking soda. The skin-side is placed down and they are simmered for about 10 minutes. This step conditions the skin so that it fries up correctly.
Step 2:
These boiled pieces are placed in a pan with cool oil meat side down. Keep the temperature low. This step begins to render the fat and brown the meat.
Step 3:
With the temperature still in the medium range, flip the pieces over so that the skin side is down. Make sure that enough fat has rendered out so that the skin doesnt stick to the pan. I would NOT suggest teflon (high heat causes teflon to outgas toxins) and DO suggest a nicely seasoned cast iron pan like you see in these photos.
Step 4:
Bring the temp up slowly and cook until the skin is crispy, as shown below. Remove and cool enough to serve.
Step 5:
Once cool enough to handle, cut into smaller pieces, salt to taste, serve with slices of lime.
Related Posts:
- How-2 guide on how to make Platanos (fried plantains or tostones)
- Yucas Fritas (Fried Yucas or Cassava Root) Recipe and How 2 photos
- Empanadas - The Recipe
- Flash Flickr Movie of How to make Colombian Empanadas
- Chicharron - Deep fried pork belly - How To
- How to make Colombian Empanadas - directions
- Latest full recipe for Colombian Bunuelos (2006 post)
- Last year's Christmas Bunuelo Decadence
- A Colombian breakfast How-2 guide
- Colombian Frescos
- Lechona preparation
Deep Fried Yucas (Cassava Root)
Published by nika on at 7:49 AM.
Related Posts:
- How-2 guide on how to make Platanos (fried plantains or tostones)
- Yucas Fritas (Fried Yucas or Cassava Root) Recipe and How 2 photos
- Empanadas - The Recipe
- Flash Flickr Movie of How to make Colombian Empanadas
- Chicharron - Deep fried pork belly - How To
- How to make Colombian Empanadas - directions
- Latest full recipe for Colombian Bunuelos (2006 post)
- Last year's Christmas Bunuelo Decadence
- A Colombian breakfast How-2 guide
- Colombian Frescos
- Lechona preparation
Christmas Bunuelo Decadence
Published by nika on Sunday, December 25, 2005 at 12:33 PM.
Served with hot chocolate
Recipe coming up.
Related Posts:
- How-2 guide on how to make Platanos (fried plantains or tostones)
- Yucas Fritas (Fried Yucas or Cassava Root) Recipe and How 2 photos
- Empanadas - The Recipe
- Flash Flickr Movie of How to make Colombian Empanadas
- Chicharron - Deep fried pork belly - How To
- How to make Colombian Empanadas - directions
- Latest full recipe for Colombian Bunuelos (2006 post)
- Last year's Christmas Bunuelo Decadence
- A Colombian breakfast How-2 guide
- Colombian Frescos
- Lechona preparation
Divine Colombian Empanadas - recipe to come
Published by nika on at 11:59 AM.Related Posts:
- How-2 guide on how to make Platanos (fried plantains or tostones)
- Yucas Fritas (Fried Yucas or Cassava Root) Recipe and How 2 photos
- Empanadas - The Recipe
- Flash Flickr Movie of How to make Colombian Empanadas
- Chicharron - Deep fried pork belly - How To
- How to make Colombian Empanadas - directions
- Latest full recipe for Colombian Bunuelos (2006 post)
- Last year's Christmas Bunuelo Decadence
- A Colombian breakfast How-2 guide
- Colombian Frescos
- Lechona preparation
Chocolate covered candied whole cranberries
Published by nika on Saturday, December 24, 2005 at 8:35 AM.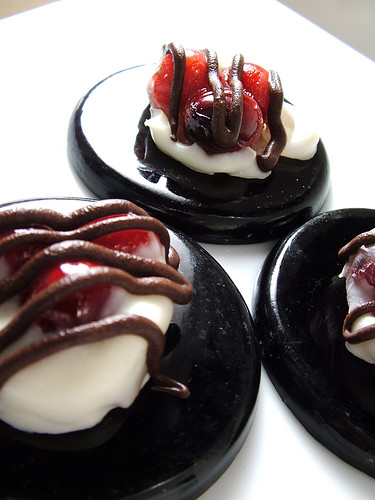
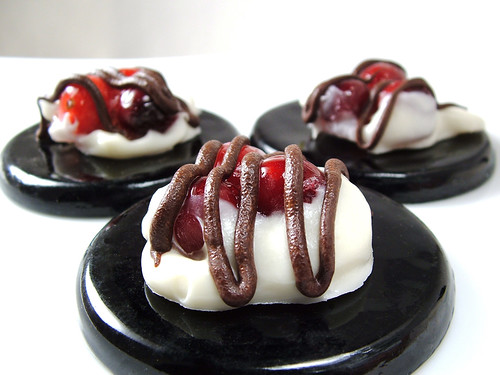
I made these yesterday. When you pop one in your mouth you taste the chocolate and then you bite down on the candied cranberries and your mouth is filled with sweet tart cranberry juice! A very interesting treat.
Cranberry Clusters
Recipe courtesy The Cookworks, 2003
Show: Cookworks
Episode: Christmas Candyland
Recipe Summary
Difficulty: Expert
Prep Time: 25 minutes
Inactive Prep Time: 20 minutes
Cook Time: 20 minutes
Yield: 2 dozen
1 cup sugar
1/2 cup water plus 2 tablespoons
1 1/4 cups fresh cranberries
1 1/4 cups chopped best-quality white chocolate
Special equipment: a candy thermometer
Combine the sugar and 1/2 cup of water in a saucepan over medium heat. Stir until the sugar is dissolved. Increase the heat to high and, without stirring, cook until the syrup is golden amber or until a candy thermometer reads between 250 to 265 degrees F (hard-ball stage), about 10 minutes (see Cook's Note*). Promptly remove the saucepan from the heat.
Working quickly, drop 3 cranberries into the caramel. Use 2 forks to coat the cranberries completely in the syrup and pull together into a cluster. Place the cranberry cluster on a waxed paper lined baking tray. Repeat with the remaining cranberries. Reheat the syrup briefly over low heat if it starts to thicken. Let the clusters cool to harden.
Melt the white chocolate in a stainless-steel bowl over barely simmering water. Stir constantly with a rubber spatula until the white chocolate is almost completely melted. Be careful that no moisture gets into the chocolate, or it will harden. Remove the bowl from the heat and allow the white chocolate to cool slightly.
Dip the bottom of the cranberry cluster into the white chocolate and place on a parchment paper lined baking sheet to set for approximately 20 minutes. Place clusters in paper candy cups and store in an airtight container.
*Cook's Note: To determine hard-ball stage without a candy thermometer, remove the pot from the heat and dip the bottom of the pot in water to stop the mixture from cooking further. Carefully spoon a drop of the hot syrup mixture into ice-cold water. It should mold easily into a ball in the water and should retain its shape when removed from the water. The ball should be sticky and fairly resistant to pressure outside the water but not crunchy.
Plantains
Published by nika on Friday, December 23, 2005 at 8:45 AM.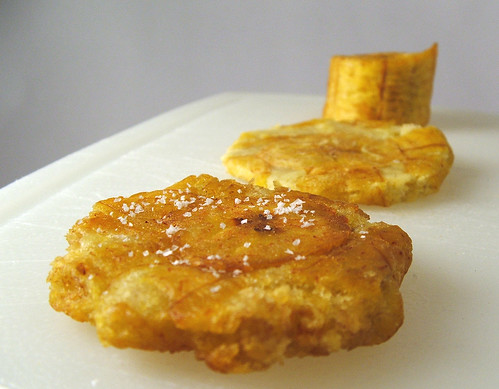
Related Posts:
- How-2 guide on how to make Platanos (fried plantains or tostones)
- Yucas Fritas (Fried Yucas or Cassava Root) Recipe and How 2 photos
- Empanadas - The Recipe
- Flash Flickr Movie of How to make Colombian Empanadas
- Chicharron - Deep fried pork belly - How To
- How to make Colombian Empanadas - directions
- Latest full recipe for Colombian Bunuelos (2006 post)
- Last year's Christmas Bunuelo Decadence
- A Colombian breakfast How-2 guide
- Colombian Frescos
- Lechona preparation
Brie and puff pastry - basil - lime
Published by nika on Thursday, December 22, 2005 at 2:30 PM.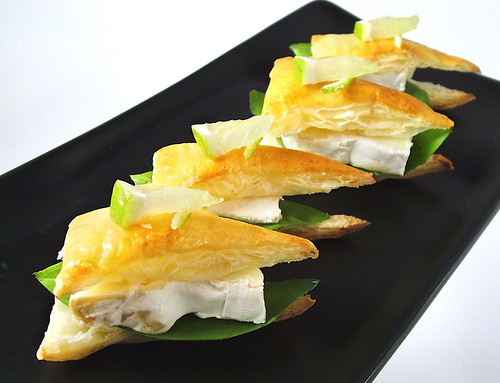
Brie, basil, and lime pastry triangles
Ingredients:
Pastry dough sheets
Egg wash:
1 whole egg
1 tablespoon of water
Pinch of salt
Stuffing:
Fresh Basil leaves
Sliced lime wedgelets
Brie slices (rectangles to fit size of triangle)
Directions:
Preheat oven to 450 F.
Make egg wash first and let it sit about 30 minutes. Simply whisk egg, salt, and water to well mixed.
Roll a pastry sheet a bit thinner than what you get when it comes out of the package, perhaps 1/8th of an inch. Slice dough into triangle shapes. Do not make it bigger than a mouth full or else the first bite will lead to flakes everywhere. Put on greased parchment or foil. Brush well with egg and pop in oven, cover with foil. Watch triangles for desired golden brown color. Remove foil if not browning without bottom burning.
Allow to cool and then, using a sharp knife, pry the triangle open. These would be great for many types of filling, up to your creativity.
Put a basil leaf on bottom slice (cut to size), place a brie slice on top (cut to size of triangle), place top of triangle, garnish with sliced lemon wedgelet.
Enjoy!
A Colombian Kitchen in the frozen wastes of Massachusetts
Published by nika on Wednesday, December 21, 2005 at 1:45 PM.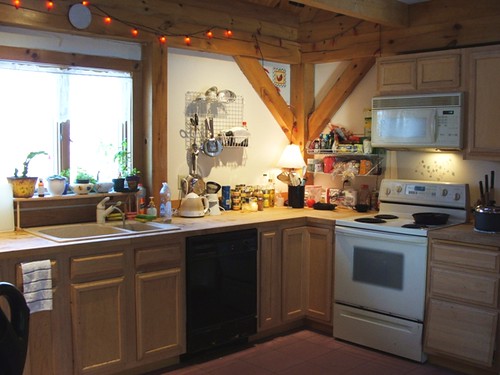
The Kitchen :-)
We are cooking up a Colombian food storm. We will be posting up illustrated recipes for a traditional Colombian fritanga.
Related Posts:
- How-2 guide on how to make Platanos (fried plantains or tostones)
- Yucas Fritas (Fried Yucas or Cassava Root) Recipe and How 2 photos
- Empanadas - The Recipe
- Flash Flickr Movie of How to make Colombian Empanadas
- Chicharron - Deep fried pork belly - How To
- How to make Colombian Empanadas - directions
- Latest full recipe for Colombian Bunuelos (2006 post)
- Last year's Christmas Bunuelo Decadence
- A Colombian breakfast How-2 guide
- Colombian Frescos
- Lechona preparation
Fritanga, Sancocho, Lechona, oh my!
Published by nika on Saturday, December 17, 2005 at 10:29 AM.Ok kids, this holiday season will be a time of going back to basics and feasting on the Colombian food of my youth! Over the next few days I am going to share various recipes that we will be cooking up next week. For those of you out there who might wish to try some of these recipes but have not had Colombian food, remember, we Colombians do not add chilies to our food like in Mexico. I like jalapenos as much as the next Texan (or ex-pat Texan in my case) and have eaten them like you might nibble on a chip, but Colombian food is simply not spicy. It DOES have lots of cominos (cumin), cilantro, fresh limes, lemons, and onions etc.
A short list of Colombian foods that I associate with the wonderful Christmas-time feasts (ok, any time of year) included the following:
- Lechona (roast whole pig with this amazing stuffing that I will share once I ask my mom!)
- Fritanga. This is a term for a feast meal (sorta like New England Clam Bake):
Patacones (double fried green plantains)
Yucas Fritas (boiled and then deep fried yuca slices – yuca = cassava root in English)
Empanadas (deep fried finger length meat filled yellow masa covered “turnovers”)
Pique (an oniony, limey, vinagary concoction you spoon onto these foods)
Chicharrones (deep fried fat back)
Arepas (corn meal cakes, grilled, soaked in butter and sprinkled with salt)
- Sancocho (chicken or beef soup base, cut up plantains –not fried-, yuca pieces, onions, cominos, cilantro, limon, cooked for hours)
- Arepa de huevos (hand size arepa that’s been grilled, opened along the side, egg inserted, pinched closed, dropped in hot fat, fried till sealed closed and egg slightly cooked)
- Tamal (communal effort to make no end to beef, pork, and/or chicken filling, peas, yucas, potatoes, all nestled in a masa harina paste that lies in a foil pouch, all closed up and steamed, best eaten at midnight)
- Natilla (corn pudding like substance that I will NOT be making – blech)
- so much more! So little time!
We will see how far we get.
Check back for our photo diary of these recipes and actual recipes!
Related Posts:
- How-2 guide on how to make Platanos (fried plantains or tostones)
- Yucas Fritas (Fried Yucas or Cassava Root) Recipe and How 2 photos
- Empanadas - The Recipe
- Flash Flickr Movie of How to make Colombian Empanadas
- Chicharron - Deep fried pork belly - How To
- How to make Colombian Empanadas - directions
- Latest full recipe for Colombian Bunuelos (2006 post)
- Last year's Christmas Bunuelo Decadence
- A Colombian breakfast How-2 guide
- Colombian Frescos
- Lechona preparation
Chocolate Creme Pie
Published by nika on Friday, December 16, 2005 at 9:16 AM.
Menu for Hope II
Published by nika on Thursday, December 15, 2005 at 3:17 PM.
For the winners of my prints and pinwheels who are visiting here - you do not need to register with blogger etc - just drop me an email at nika7k at yahoo dot com. After I verify your winning status, I will prepare and send your winning prize! Thanks again for bidding in the Menu For Hope!

I think one thing that we foodies share is an abundant attitude. What is more fundamental than what we eat? What better way to be a part of another person, people, community, the world, than to help them eat and eat honest nurturing food?
For these reasons I am very happy to be one of MANY food bloggers across the globe who are helping Chez Pim with her Menu for Hope (II).
As of December 15 (today) she has raised $5,848.00! That is amazing, and its something we can all be a part of.
Stealing from her blog, she says:
See all the other kewl things you could win in this raffle at Pim's site.
I think one thing that we foodies share is an abundant attitude. What is more fundamental than what we eat? What better way to be a part of another person, people, community, the world, than to help them eat and eat honest nurturing food?
For these reasons I am very happy to be one of MANY food bloggers across the globe who are helping Chez Pim with her Menu for Hope (II).
As of December 15 (today) she has raised $5,848.00! That is amazing, and its something we can all be a part of.
Stealing from her blog, she says:
Last year, we raised a substantial sum to support the victims of the Tsunami in Southeast Asia. This year, a group of us food bloggers would like to ask our readers -that would be you- to help us raise funds to support the victims of the devastating earthquake in the Kashmir region of India and Pakistan.
But what fun would it be just to come begging you for some dough, even if it is for a great cause? So, in order not to turn our otherwise fun blogs into the PBS pledge break bore, we've put together a huge list of cool, fun, and personal gifts -like only we could- to entice you to donate. Each of those gifts is offered as a virtual raffle prize. All you have to do is donate $5 and you will be eligible for the raffle drawing for a gift of your choice.
We are once again using the site FirstGiving to collect the donation. In the interest of transparency, FirstGiving will do all the collection and forward the funds directly to Unicef, our recipient organization. The fund will be earmarked to support the victims of the Kashmir earthquake.
Recipe to participate:
1. Find the gift you would like on our menu.
2. Go to A Menu for Hope II donation page and donate $5 or whatever sum you could spare.
3. Tell us in the comment section of your donation form which gift(s) you would like have. Each $5 donation will give you one chance at winning the prize of your choice. (Yes, if you donate more than $5, you are allowed to specify more than one prize.)
4. That's it!
Our campaign will end on December 23rd, and the winners will be announced and the prizes sent to corresponding winners after January 1st 2006.
See all the other kewl things you could win in this raffle at Pim's site.
macro pretzels
Published by nika on at 11:43 AM.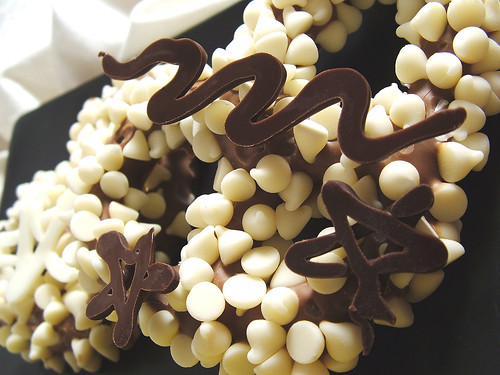
Sinful chocolate covered chip studded pretzels
Published by nika on Wednesday, December 14, 2005 at 9:27 AM.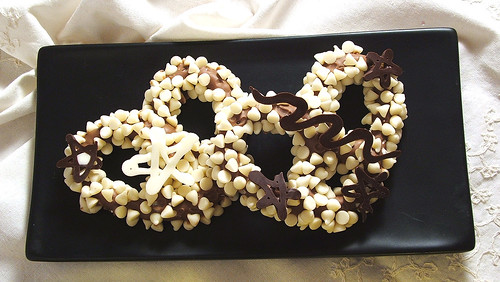
Chocolate truffles
Published by nika on Tuesday, December 13, 2005 at 11:41 AM.
Flickr Flash Slide Show
Published by nika on Monday, December 12, 2005 at 9:39 AM.Please note that this slide show gets dynamically updated when ever I load new food pics into my Flickr food set. Come back and visit. I have also linked this on the bar to the right (in profile section) to make it easier to find when you come back later. I apologize to those who do not have flash-capabilty.
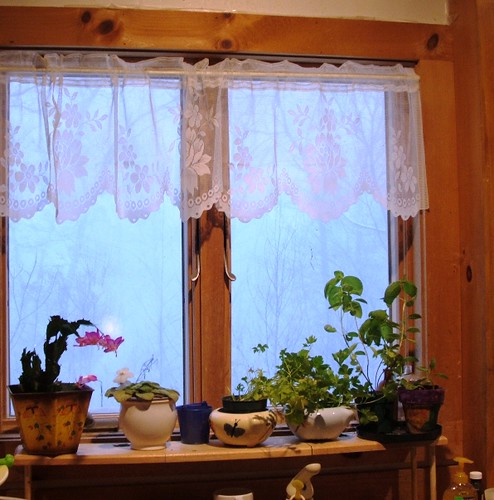
Poor kitchen herbs
Published by nika on Friday, December 09, 2005 at 1:38 PM.
Its hard to have robust green herbs if your kitchen window is lost in dense swirls of snow!!