Handcrafted organic butter
Published by nika on Monday, July 31, 2006 at 11:16 AM.
Lately, I have been focusing on some basic cooking with my 9 year old daughter Q. You saw her and her little sister KD in a recent post on making Challah. We also did the whole homemade strawberry jam making post (with upcoming blueberry post). We have gotten a lot of good feedback from these series so I am continuing to shoot our basic skills work.
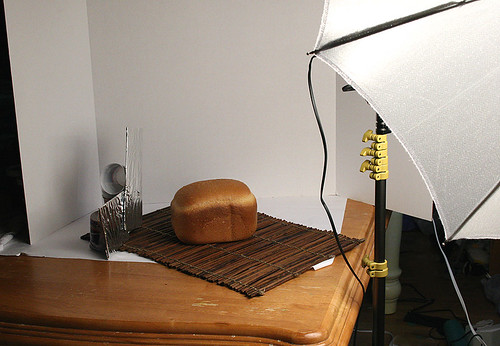
Today is a series of rather static non-action shots of how to make butter. I was testing a new light set up and it was geared more toward product photography than editorial type of shots.
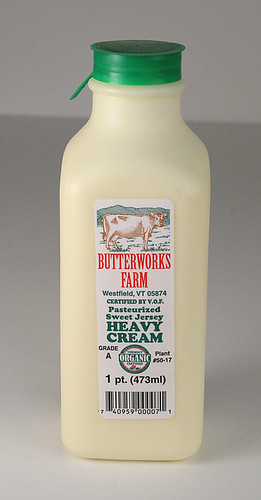
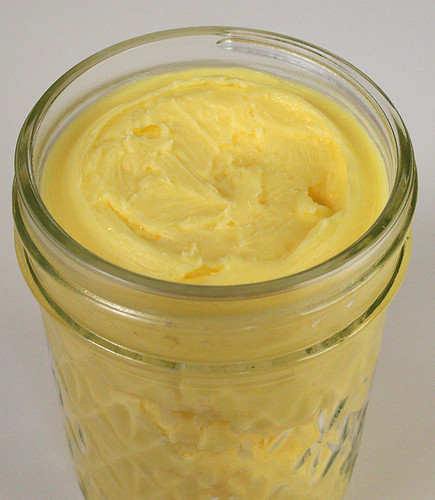
We started with organic sweet jersey cream. Its really worth the money to go with this more expensive product because you get a wholesome, flavorful, and colorful butter in the end.
Why does it matter if the animals pastured on greens instead of cereals from a bag?
The chlorophyls and other colored plant constituents (phytochemicals like beta carotenes) are partially carried over into the milk and thus cream. Commercially produced milk from huge dairies does not have these phytochemicals and thus butter made from this sort of milk must have food coloring added. The breed of dairy cow also determines butter color, Jersey (which we used here), tends to have a more yellow butter color.
Wikipedia entry for butter
Back to the "Making of Butter" (Imagine a majestic announcer voice like from Monty Python)
Ingredients:
COLD Heavy Cream
Salt, to taste (at the end, do not add to the cream)
Hardware:
A large plastic soda bottle that has been thoroughly washed
One COLD clean glass marble
COLD stainless steel bowl
COLD stainless steel or plastic fine sieve
COLD spatula
Xacto knife
Directions:
Make certain that your bowl and sieve are washed and in the fridge cooling.
Assemble your cream whipping supplies: cream, soda bottle, and marble.
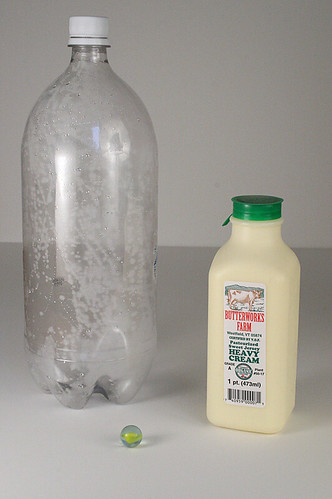
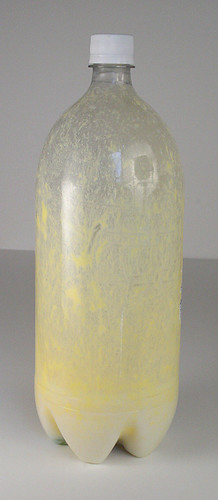
Put the marble and cream inside of the soda bottle.
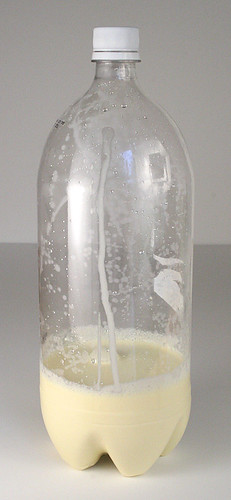
Now hand the bottle to your child and have him/her shake the bottle. First it will be what you expect, sloshing cream and a marble rattling about.
Then the solution changes as the fat droplets begin to come out of solution and the marble rattling sound goes away (must be coated with fat). This may happen quickly (like in 5 minutes for us) or longer (perhaps 15 minutes, depends on the size of you container. The bigger container with more shake room the faster the process is.)
Continue shaking until the sound of the rattling marble comes back. Now the fat has come together in a nice big ball in the soda bottle and you are done with shaking. This might be quick or take 15 - 30 minutes. If its taking a while put the bottle in the fridge to chill after about 20 minutes, you do not want the fat to melt.
Once done, have the child rest, maybe some juice would help.
Put the bottle in the refrigerator so that it can get a nice chill back.
Have your bowl and sieve ready.
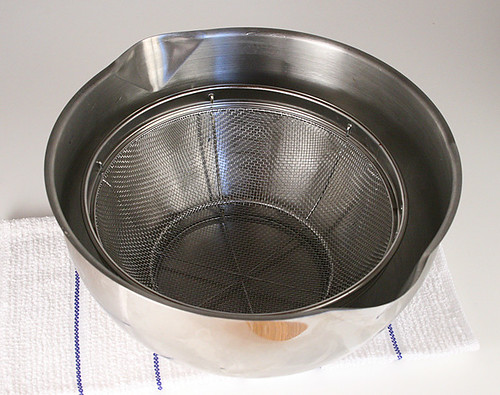
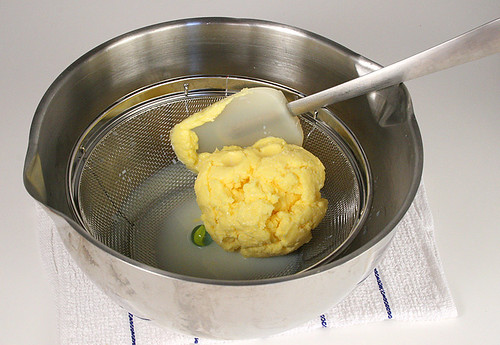
Pour buttermilk out the top of the bottle and then cut it open around the middle. (Dont let the kid do this, blood is not a recommended ingredient in butter) Let the ball of butter drop into the sieve and use a cold spatula to scrape down butter on the walls of the bottle.
Save the buttermilk for other uses.
Rinse out the bowl with cold water and then put the butter in the bowl.
Massage the butter with the spatula by pushing it against the side of the bowl repeatedly. You will see more buttermilk come out of the butter, rise with cold water.
Continue until no buttermilk comes out. (The buttermilk, if left in, will make the butter go rancid).
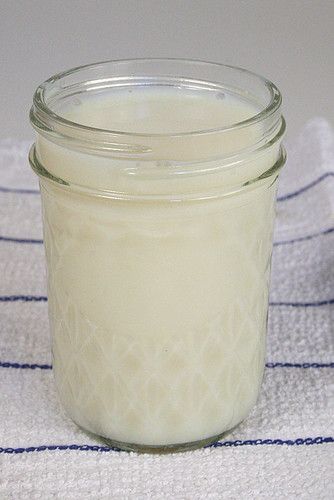
Add some salt and mix in. You will want to do this until a taste test tells you it is salty enough for you.
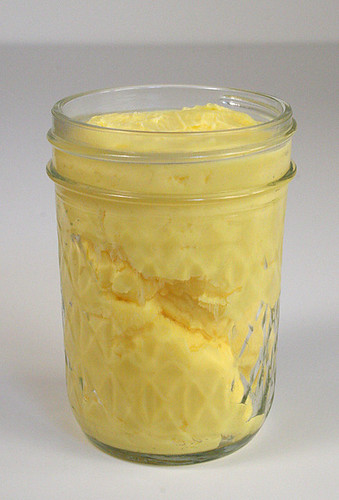
Store the butter in a container that excludes air (oxygen will form free radicals with the fat – goes rancid).
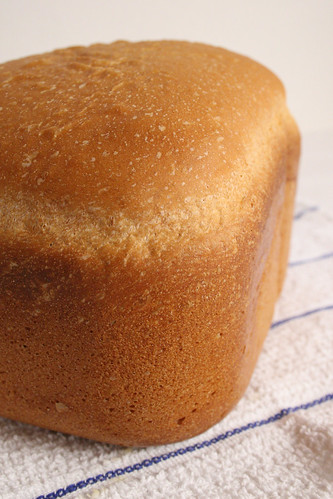
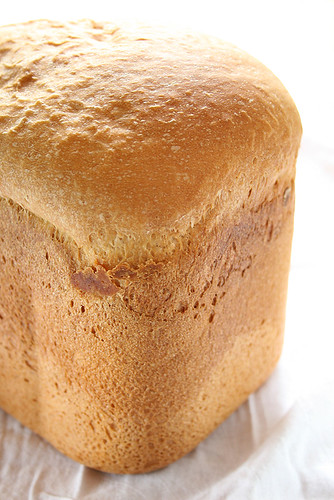
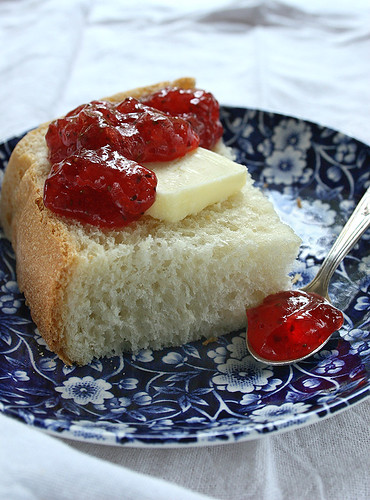
Enjoy on some fresh bread!
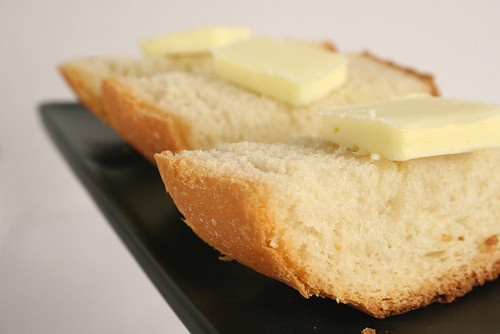
(This is actually a shot with store bought butter but I could not resist :-))
Technorati taggage:
butter, homemade, handcraft, food, culinary, cooking, handcrafted, fat, lipid, phytochemical, chrlorophyl, bread, cream, jersey, organic, heavy cream, cold.
Today is a series of rather static non-action shots of how to make butter. I was testing a new light set up and it was geared more toward product photography than editorial type of shots.
We started with organic sweet jersey cream. Its really worth the money to go with this more expensive product because you get a wholesome, flavorful, and colorful butter in the end.
Why does it matter if the animals pastured on greens instead of cereals from a bag?
The chlorophyls and other colored plant constituents (phytochemicals like beta carotenes) are partially carried over into the milk and thus cream. Commercially produced milk from huge dairies does not have these phytochemicals and thus butter made from this sort of milk must have food coloring added. The breed of dairy cow also determines butter color, Jersey (which we used here), tends to have a more yellow butter color.
Wikipedia entry for butter
Back to the "Making of Butter" (Imagine a majestic announcer voice like from Monty Python)
Ingredients:
COLD Heavy Cream
(try not to get the homogenized type, the fat droplets have been hyperfractured and may be a bit more difficult to coalesce into butter)
Salt, to taste (at the end, do not add to the cream)
Hardware:
A large plastic soda bottle that has been thoroughly washed
(If you need to, rinse with alcohol or a light chlorine solution and then rinse with water - A LOT. I figured the carbonic acid in the soda (VERY LOW pH) would have kept anything nasty from growing in the seltzer bottle I used)
One COLD clean glass marble
COLD stainless steel bowl
COLD stainless steel or plastic fine sieve
COLD spatula
Xacto knife
Directions:
Make certain that your bowl and sieve are washed and in the fridge cooling.
Assemble your cream whipping supplies: cream, soda bottle, and marble.
Put the marble and cream inside of the soda bottle.
Now hand the bottle to your child and have him/her shake the bottle. First it will be what you expect, sloshing cream and a marble rattling about.
Then the solution changes as the fat droplets begin to come out of solution and the marble rattling sound goes away (must be coated with fat). This may happen quickly (like in 5 minutes for us) or longer (perhaps 15 minutes, depends on the size of you container. The bigger container with more shake room the faster the process is.)
Continue shaking until the sound of the rattling marble comes back. Now the fat has come together in a nice big ball in the soda bottle and you are done with shaking. This might be quick or take 15 - 30 minutes. If its taking a while put the bottle in the fridge to chill after about 20 minutes, you do not want the fat to melt.
Once done, have the child rest, maybe some juice would help.
Put the bottle in the refrigerator so that it can get a nice chill back.
Have your bowl and sieve ready.
Pour buttermilk out the top of the bottle and then cut it open around the middle. (Dont let the kid do this, blood is not a recommended ingredient in butter) Let the ball of butter drop into the sieve and use a cold spatula to scrape down butter on the walls of the bottle.
Save the buttermilk for other uses.
Rinse out the bowl with cold water and then put the butter in the bowl.
Massage the butter with the spatula by pushing it against the side of the bowl repeatedly. You will see more buttermilk come out of the butter, rise with cold water.
Continue until no buttermilk comes out. (The buttermilk, if left in, will make the butter go rancid).
Add some salt and mix in. You will want to do this until a taste test tells you it is salty enough for you.
Store the butter in a container that excludes air (oxygen will form free radicals with the fat – goes rancid).
Enjoy on some fresh bread!
Technorati taggage:
butter, homemade, handcraft, food, culinary, cooking, handcrafted, fat, lipid, phytochemical, chrlorophyl, bread, cream, jersey, organic, heavy cream, cold.
Strawberry Jam Delight
Published by nika on Friday, July 28, 2006 at 9:54 AM.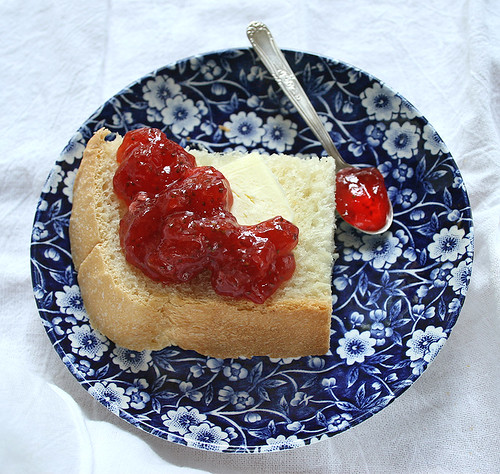
When I was growing up, summer jam was never something we made in my house. We lived near corn fields in Illinois and Iowa and would enjoy sweet corn but we never canned it. I think my mother had done quite enough of that on the farm she grew up on so she didn’t feel driven to do it later. She made whole wheat bread but we never even had store bought jam at home, it was considered junk food. Today, I still do not eat jelly or jam unless it is on the table at a restaurant and it looks interesting. Nor do we eat peanut butter and jelly sandwiches due to food allergies.
With all this you might wonder why I would even chose to make strawberry jam at all.
Blame blueberries.
We live on a small mountain where wild and domestic blue berries grow with complete abandon. The domestic patches at nearby orchards have been slow to come up but now we are starting the picking season.
Strawberry jam was just a practice run for the blueberry jam we will be making after our pickfest!
So how did it turn out?
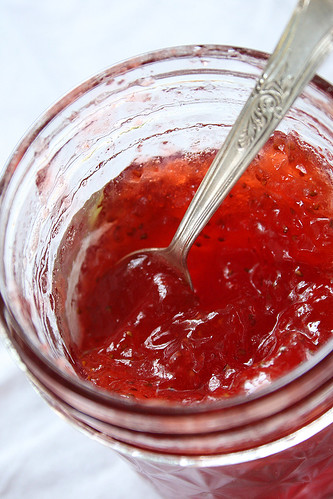
Even though this was a proof-of-concept for me, WOW, does homemade fresh strawberry jam taste GOOD and nothing like the stuff you buy at the grocery store. It is worth the trouble 10 times over.
How is it different? It have many layers of flavor, not just the flat monotone of artifical flavors in commercial jams. The flavor profile develops all across the tongue with at least three different seperable flavor experiences, finishing pleasantly at the back of the throat. I made mine chunky so it really perked up the texture and experience.
This jam is pretty easy to make especially since it doesn't require a pressure cooker, just a boiling water bath.
I took the recipe from the insert that you find tucked inside Ball Fruit Jell Pectin and it could not be easier.
Strawberry Jam
Ingredients:
1 box of Ball Fruit Jell Pectin
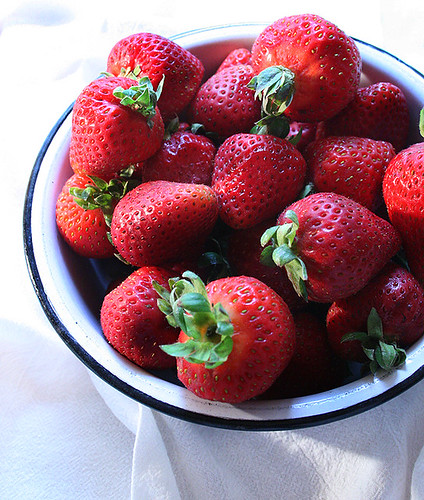
5 C crushed strawberries (2 quarts)
1/4 C Fresh Squeezed lemon juice
7 C sugar
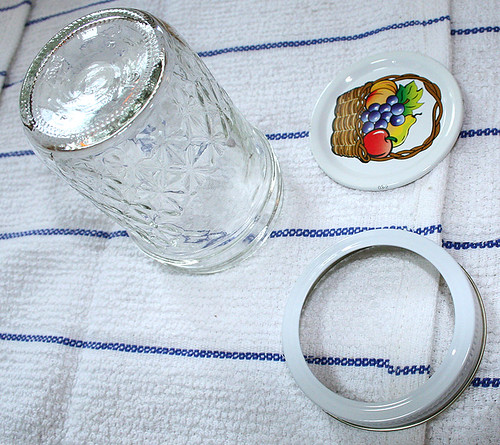
8 - 8 oz. Ball jelly jars with sealing domes and rings
Directions (some of these are my own and some from the insert):
But a large pot of water onto boil. You will want to cover your jars with 1 and 1/2 inches of water after all are added. Have some hot boiling water available to top it off.
Jar cleaning (My method):
Into an empty dishwasher place jelly jars, lids, and rings. Run on the most robust setting (we used "pots and pans") without any other dirty dishes. If you are not ready for the jars at the end of the cycle keep setting the machine back to the beginning of the dry cycle to keep them hot and relatively sterile.
Clean strawberries by rinsing in cold water, cutting off the leaves and removing the white core under the leaves. Cut them in half and let drip dry a bit while you clean the whole batch.
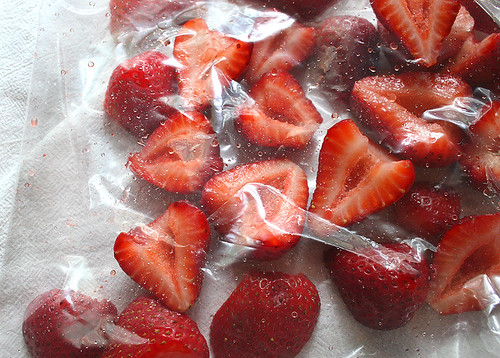
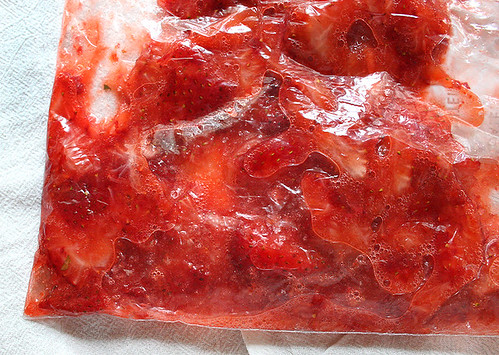
Cut the berries in half and put a portion in a large freezer bag, close, and crush the strawberries. If you like a chunky jam do not crush the berries into a liquid! Do not use a food processor. You can also use a bowl and potato masher if you prefer.
Put 5 cups of crushed strawberries into a large pot.
Add 1/4 cup freshly squeezed lemon juice to the pot.
Add the entire packet of pectin and stir well.
Bring this mixture to a full boil, stirring constantly.
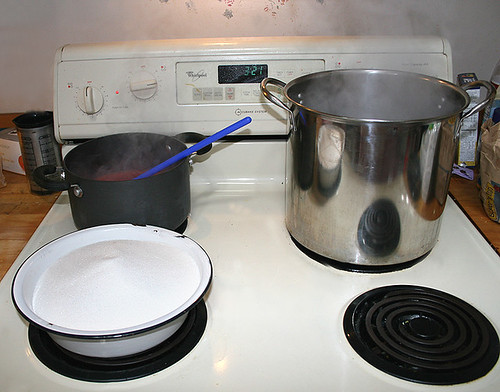
Have all 7 cups of sugar measured and add to the boiling strawberry mixture.
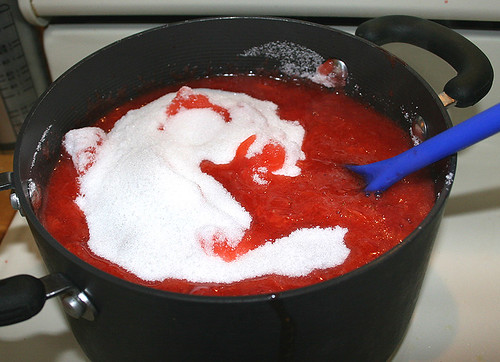
It might seem like 7 cups will not dissolve but it does pretty quickly.
Bring this to a hard rolling boil (if your pot is not big enough it WILL overflow) for 1 minute. Stir this constantly. Remove the foam that forms on the top.
Fill one jar at a time, leave 1/4 inch at the top. (this is called headspace)
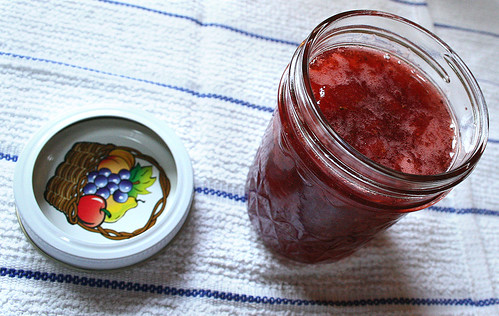
Wipe the edge and threads of the jar with a damp cloth so that nothing impedes lid sealing.
Put sealing dome lid on and then the ring, screw on tight (finger tight).
When you have filled one jar gently put it into the boiling pot of water on your stove and cover.
Repeat until all strawberry mixture is gone, adding each jar as it is closed.
Make sure the jars are covered by at least 1 and 1/2 inches of boiling water.
Boil 10 minutes if you are in a kitchen located under 1000 feet altitude, 15 minutes between 1000 – 3000 feet, 20 minutes between 3000 – 6000 feet, etc. Cover with a lid.
Carefully remove jars after boil time to a cloth on your counter.
Allow to cool 12 – 24 hours and then check each lid for a seal. If you can push down on it you will have to either pitch that jar-full or re-sterilize it. The lid should not move when you press down on it.
These jars can be stored in a dark cool pantry for up to one year.
Enjoy it with fresh homemade bread!
Technorati taggage:
strawberry, jam, food, breakfast, homemade, bread, canning, preserves, fruit, blueberry.
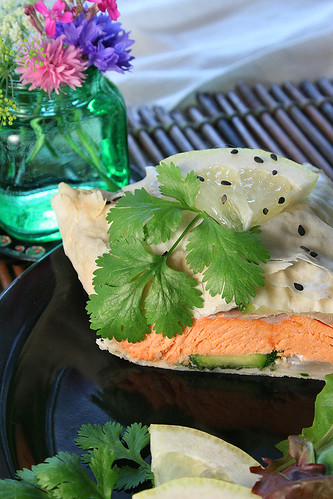
Delicious Salmon in Phyllo
Published by nika on Wednesday, July 26, 2006 at 12:47 PM.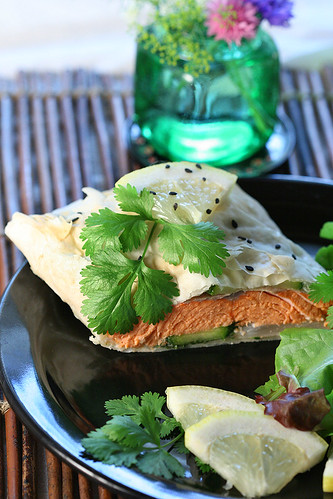
In my personal experience, being pregnant means I have to eat a lot of fish that has omega 3 oils. This means a lot of salmon. A LOT.
This can get tedious, even with the most perfect salmon one can get their hands on. For this reason, I have put together the following recipe that brings together wild caught Alaskan salmon, summer squash, fresh cilantro from my garden, brie, and organic phyllo dough.
Delicious Salmon in Phyllo
Ingredients:
Organic Phyllo Dough (The Fillo Factory Fillo Dough)
1/2 stick butter, melted
2 lbs. salmon fillets, (deboned and no skin)
1 medium summer squash
1/4 vidalia onion (must be sweet and mild)
Course sea salt, to taste
4 - 3 inch by 1.5 inch slices of brie, can leave the crust on
Fresh ground pepper
Fresh cilantro, several sprigs for phyllo pocket and some for garnish.
Lemon slices for garnish
Directions:
Preheat oven to 400 F.
Slice summer squash evenly and thinly. Place on paper towels, sprinkle with sea salt, and set aside. This will reduce some of the liquid in the squash so that the phyllo doesn’t get overloaded with squash water.
Melt the butter over low heat in a small pan.
Using proper phyllo-handling practices, lay down a layer of phyllo (whole sheet) and paint with butter-soaked pastry brush.
Repeat until 5 layers have been assembled, cut in half along the short axis so that you have two equal pieces. You will get rectangles. You can do this anyways you wish, get artistic if you like.
I made two sets of 5 layers so that I would have 4 rectangles to work with.
Set aside.
Slice the Vidalia onion very thinly; slice brie to about 3 inch by 1.5 inches, not too thick; wash several sprigs of cilantro in cold water and set all aside.
Portion the salmon into 4 equal amounts. Allow salmon to lose the chill from the refrigerator until it is almost room temp. Season with course sea salt and fresh ground pepper.
Center the salmon in the middle of the phyllo rectangle and then layer on squash slices, onion, cilantro, and brie. Fold over edge of the phyllo rectangle, paint with melted butter, and then fold over second half to form a pocket. Turn it over and place seam-side down on a parchment lined baking sheet. Brush with more melted butter.
Repeat this assembly with remainder of fish and vegetables.
Bake in the 400 F oven for 15 minutes. Watch to be sure that the phyllo does not burn on top.
Serve with cilantro and lemon garnish as well as fresh mesclun greens.
Enjoy with white wine, iced tea, or lemonade!
This does really well as leftovers the next day, eat chilled. Be sure to not store this with moist items as the phyllo dough will become really mushy.
Strawberry Fields Forever
Published by nika on Tuesday, July 25, 2006 at 3:52 PM.
A promise of things to come in the next few days.
I am whipping up my first batch of strawberry jam.
Will share all the delicious details!
Amazing Gadget: Chef'n Vegetable Peeler
Published by nika on Sunday, July 23, 2006 at 8:14 PM.
Goodness, I have got to take a moment to rave about this new gadget I bought the other day called a Chef'n Vegetable peeler. It's a vegetable peeler that is different from anything else I have seen before.
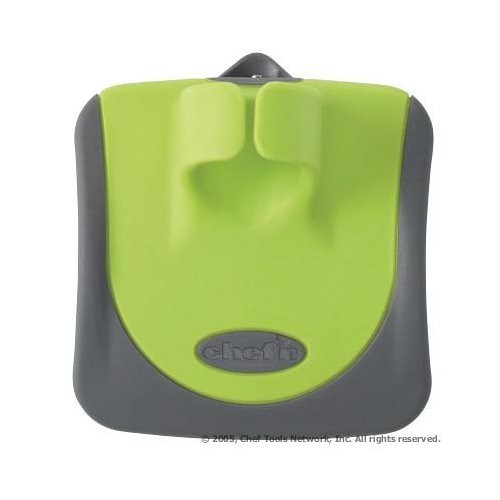
You slip this onto your finger with the blade facing away from your palm. You then sort of run your hand over the vegetable (I was peeling the lower parts of asparagus) and it's sharp blade peels efficiently. It feels effortless.
I ALWAYS cut myself with the blade of a regular peeler. I slip or it twirls around at the wrong moment. I get fatigue in my hands from holding regular peelers too (especially when peeling potatoes, yuck). (Ok, I am a bit of a peeling wuss but at least I eventually get the job done!)
This peeler is like a dream. It feels like an extension of my hand and with just a small amount of practice I was peeling delicate asparagus like a demon.
It also leaves your hand open for use because you are not holding something as its attached to your finger. So if you need to catch a slippery vegetable before it flies away from you (that's me and potatoes) you can.
It comes in this avocado color as well as stainless steel with black, stainless steel with white, sunflower, and tangerine.
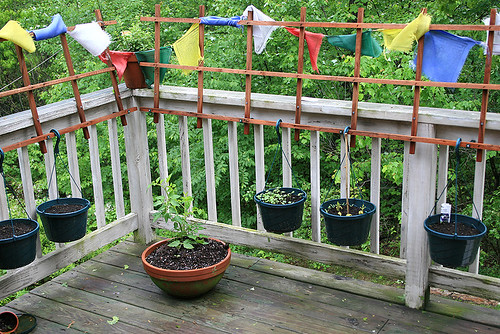
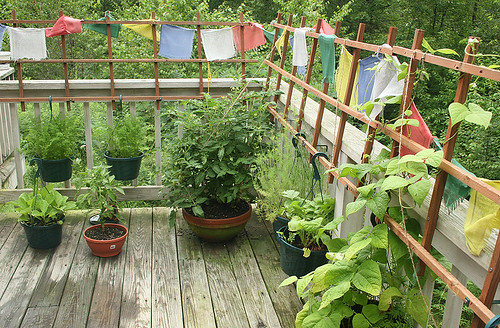
Local Foods: Organic Deck Garden update (7-23-06) - before and afters
Published by nika on at 12:48 PM.
Here is the latest update on our organic deck garden here in central Massachusetts. You may remember that this all got a very late start but we do what we can!
For those of you not familiar with earlier posts about this garden, here is a list of them:
Local foods - Organic deck garden 2006
Hail-recovery and happy sunshine
Why do I not just plant in the ground? I have Rambo rodentia and rabbits who would eat everything up in a flash if I gardened in the ground (I have been there once before, I don't need that aggravation).
Deck garden at the beginning (6-8-06):
Deck garden today (7-23-06):
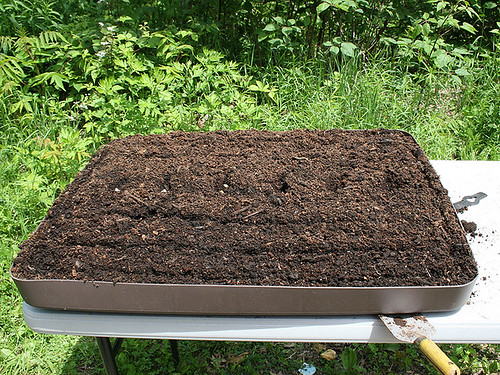
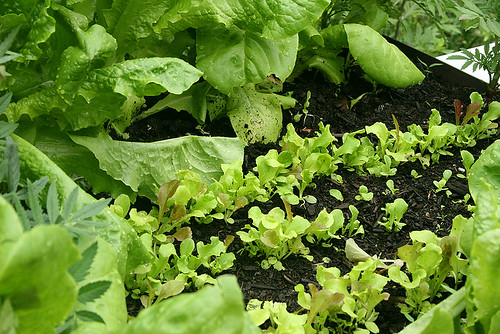
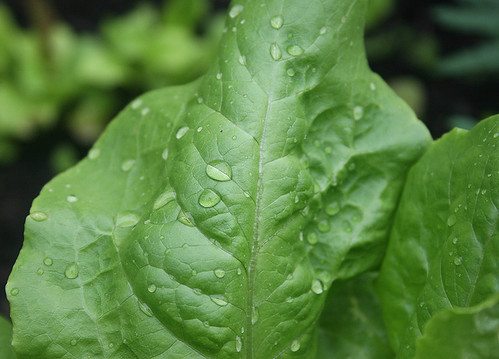
Successional Lettuce planting then:
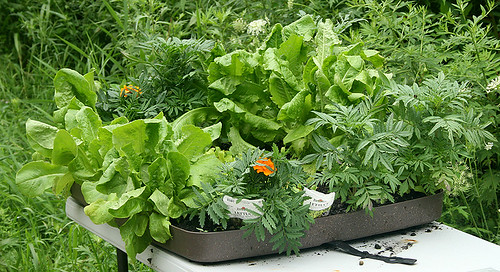
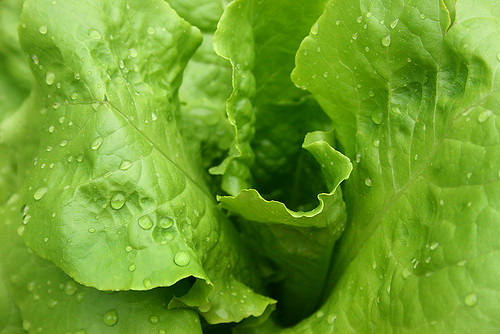
Successional Lettuce planting now:
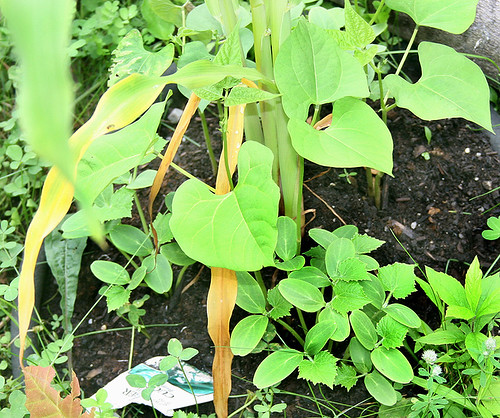
Corn transplanted from the lettuce bed to the side of the house:
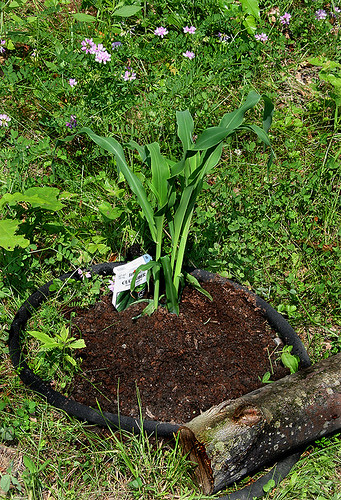
Corn, beans, cucumbers, squash, etc today:

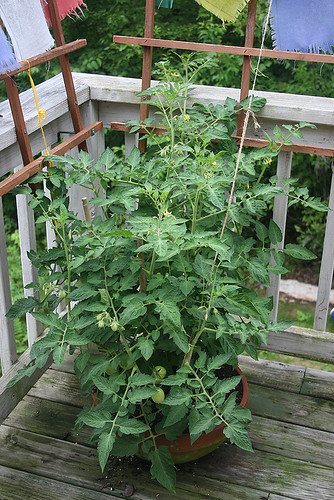
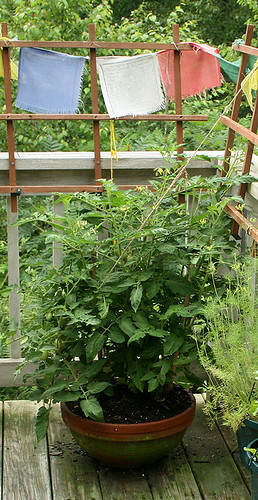
Tomato then:
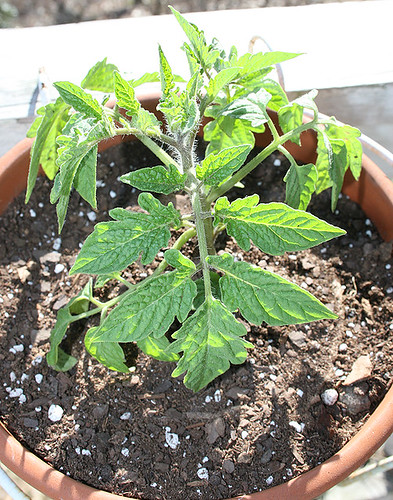
Tomatoes now:

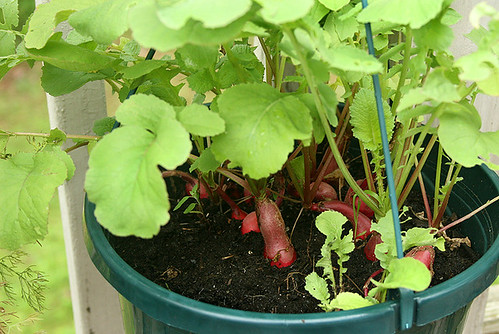
Radishes then:
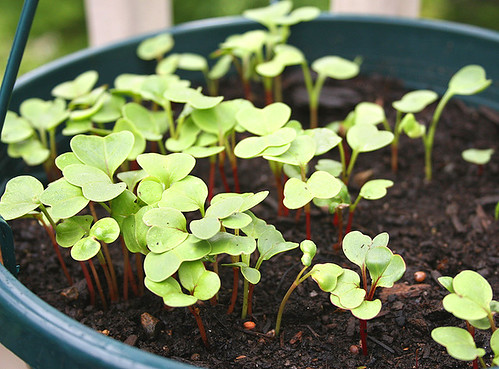
Radishes now (ready to pick):
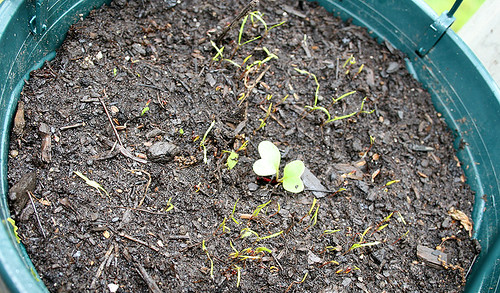
Carrots in the beginning:
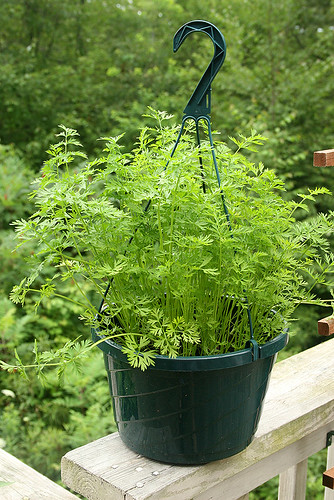
Carrots now:
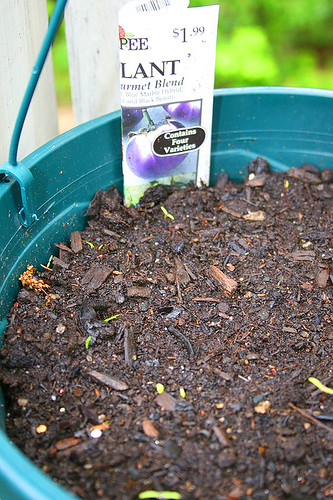
Eggplant then:
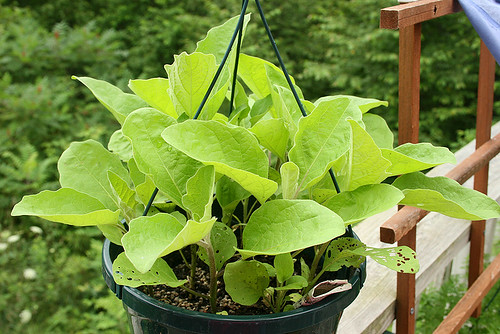
Eggplants now:
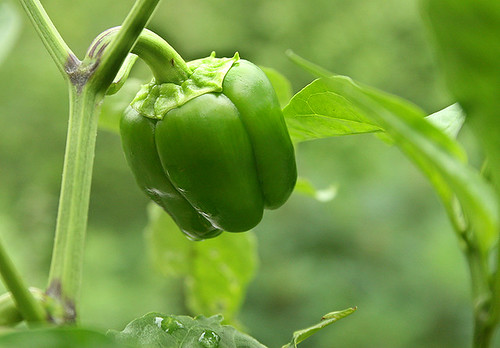
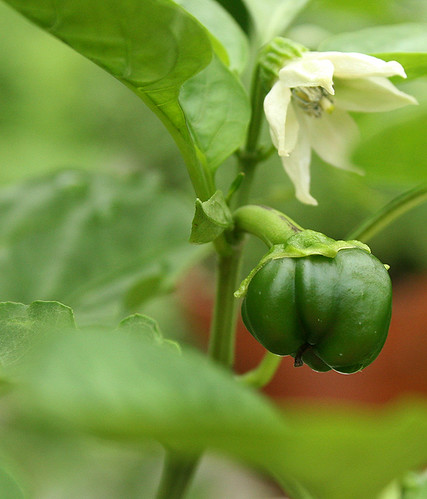
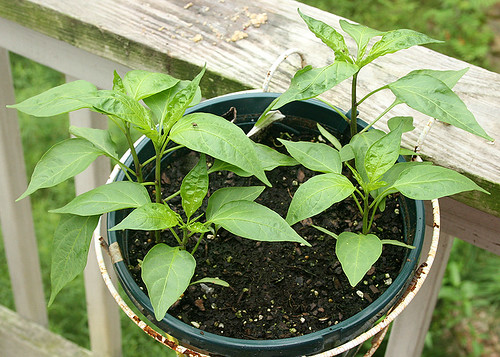
Bell Pepper then:
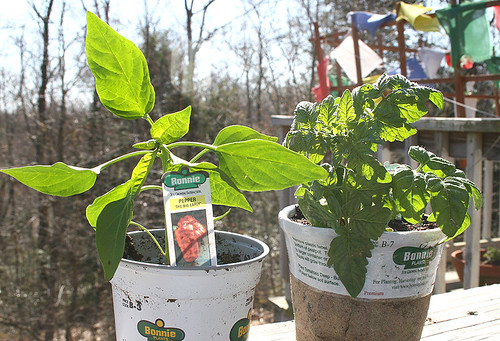
Bell Pepper now:
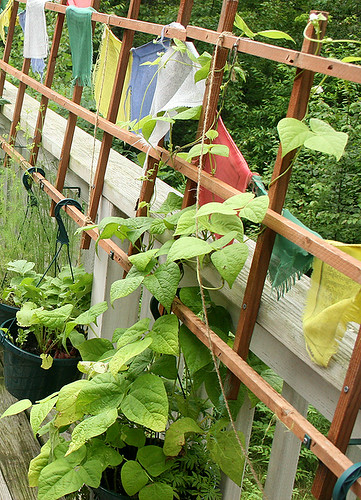
Pole beans then:
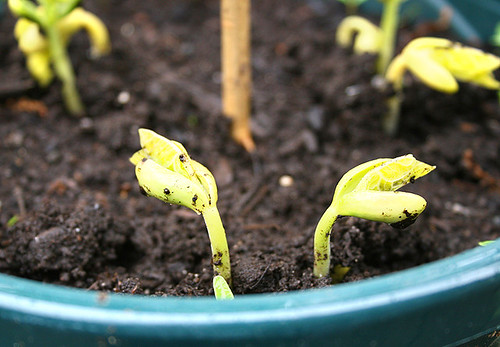
Pole beans now:
Jalapenos then:
Jalapenos now:
For those of you not familiar with earlier posts about this garden, here is a list of them:
Local foods - Organic deck garden 2006
Hail-recovery and happy sunshine
Why do I not just plant in the ground? I have Rambo rodentia and rabbits who would eat everything up in a flash if I gardened in the ground (I have been there once before, I don't need that aggravation).
Deck garden at the beginning (6-8-06):
Deck garden today (7-23-06):
Successional Lettuce planting then:
Successional Lettuce planting now:
Corn transplanted from the lettuce bed to the side of the house:
Corn, beans, cucumbers, squash, etc today:
Tomato then:
Tomatoes now:
Radishes then:
Radishes now (ready to pick):
Carrots in the beginning:
Carrots now:
Eggplant then:
Eggplants now:
Bell Pepper then:
Bell Pepper now:
Pole beans then:
Pole beans now:
Jalapenos then:
Jalapenos now:

